MPW Track Bike: Part 7
MPW track bike: Part 7
For the story so far see our blog posts MPW track bike: Part 5 (parts 1 to 4 revisited), and Part 6:
If you have been following the story of the MPW track bike project you may remember from the previous post back in June that while working on the bike we came across a few missing parts. I am happy to report that our stuff from e-bay is here, and we are now in possession of a rebuild kit for the rear brake caliper, a coolant hose, a coolant reservoir, and a cooling fan. Result. To the workshop…
GETTING STUCK IN
We are in the process of re-organising our workshop to make it a bit more user-friendly and functionally adequate for what we are doing. This goes hand-in hand with our new range of tools and workshop products that we hope will encourage and help riders to service and maintain their own bikes. Working on your own bike not only saves you money that you can spend on gadgets, accessories and fuel, but is also a great way to learn about and become more in tune with your bike, which will hopefully mean your bike becomes more in tune with itself. The more you do the more confident and ambitious you become, and it is a very satisfying and rewarding aspect of motorcycling that extends the enjoyment beyond the riding. Go for it.
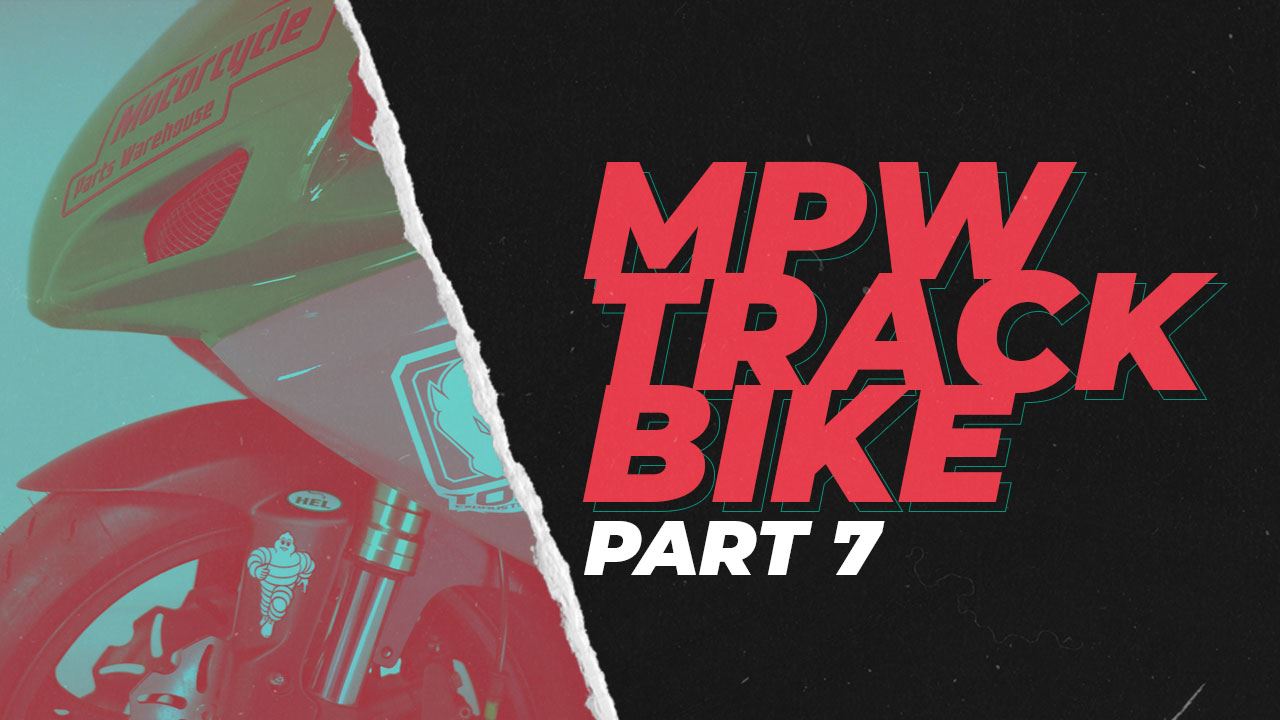
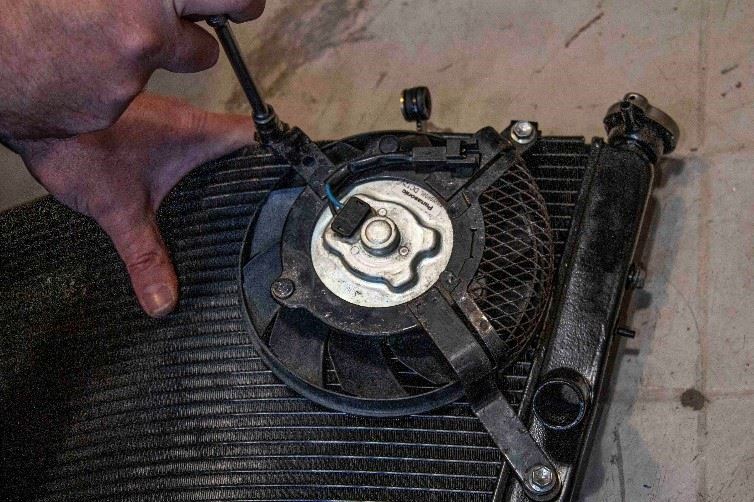
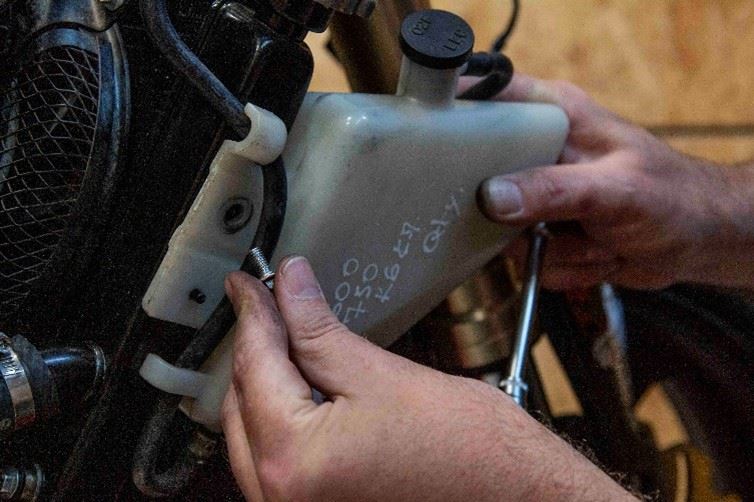
Bill gets busy and removes the radiator, fits the cooling fan onto it, then reinstalls the radiator and mounts the reservoir, and finally fits the hose between it and the pump.
Fitting the fan…
…the reservoir…
…and the hose
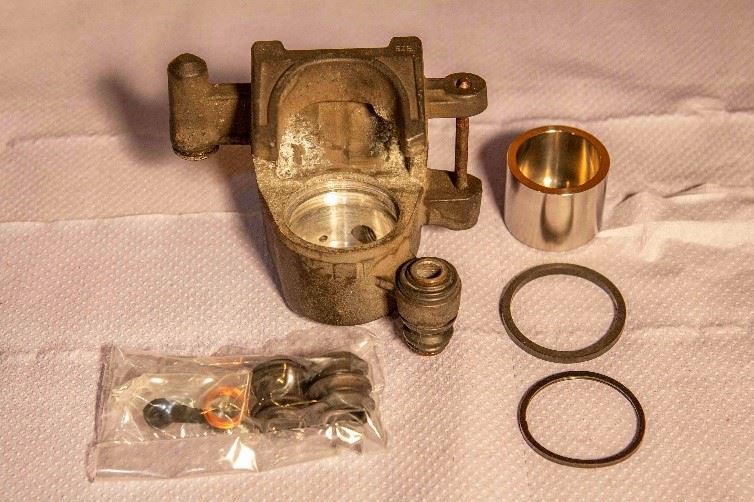
Meanwhile I get to work on the rear brake caliper. I need to remove a fair amount of corrosion, not only from the body but more importantly from the grooves in which the seals sit. But with the aid of some brake cleaner and a small stiff brush it cleans up easily enough, and with correct lubrication applied I fit the new seals and pistons. The parts all fit nicely and the new EBC pads and the caliper are soon back on the bike, and I connect the Hel brake hose.
 .
.
Nice new bits for a corroded old caliper
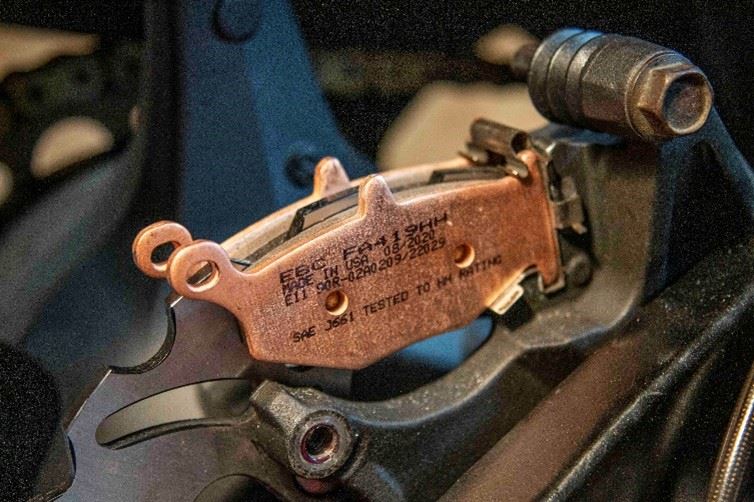
The EBC pads go on first…
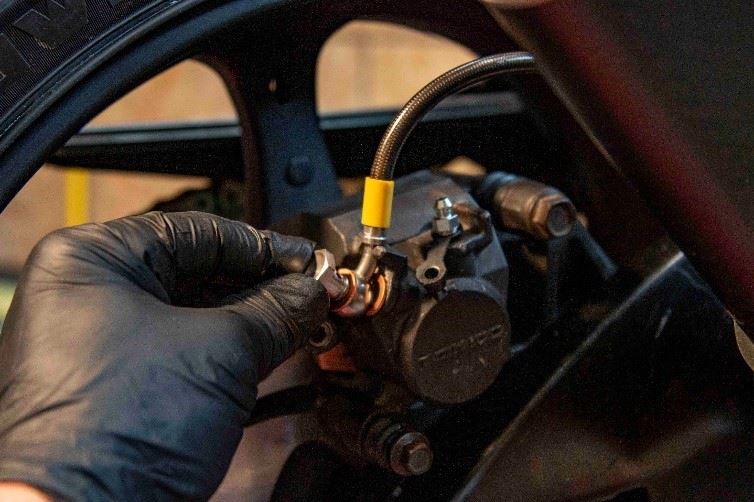
…then the caliper, and lastly the Hel hose
We add DOT4 brake fluid to the reservoir, pump it through and bleed the air, and lo and behold we have a rear brake with a good solid feel at the pedal. The front brake system, which does at least have some pistons and pads fitted in the calipers but is devoid of any fluid, does not behave so well and we have trouble getting fluid to feed from the reservoir through the master cylinder by gravity and pump action, so we are either going to reverse-bleed it from the caliper using a syringe provided by Bill, or apply a vacuum at the caliper to suck the fluid down using a Mityvac supplied by me, depending which one of us remembers to bring the tool in next week.
Instead of getting a new starter button we decide to adapt the existing switchgear to make it fit onto the left handlebar. It can no longer fit onto the right bar because of the quick-action throttle kit, but with the aid of a Dremel Bill cuts away the part of the housing that holds the cables and twistgrip pulley, then moves the wiring across so it exits the opposite side of the housing, and fits it onto the left bar. Bit different, works well, looks good. Result. Nice one Bill!
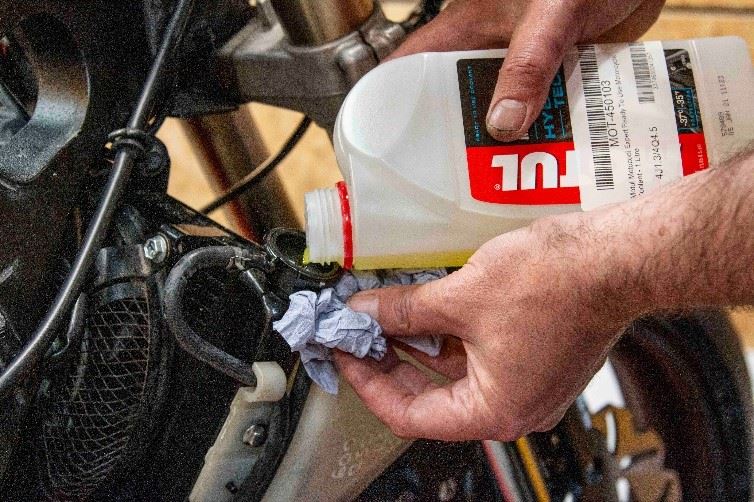
We add some Motul hybrid coolant to the cooling system, and ten minutes later find a small puddle growing under the exhaust system. We trace the leek to the inlet union on the front of the crankcase and the small hose connected to it that feeds the oil cooler, and a loose clamp. Just one more thing that has been previously tampered with and left unfinished. We are getting used to this. Tighten the clamp, no more leakage. Simple. For our final task of the day we give the engine some lifeblood, and we choose Motul’s 300V Factory Line fully synthetic 10W40, specifically developed for Factory racing teams and ideal for Supersport motorcycles. Best to check the drain plug and filter are tight first, one puddle is enough.
Coolant goes in the top, then comes out the bottom…
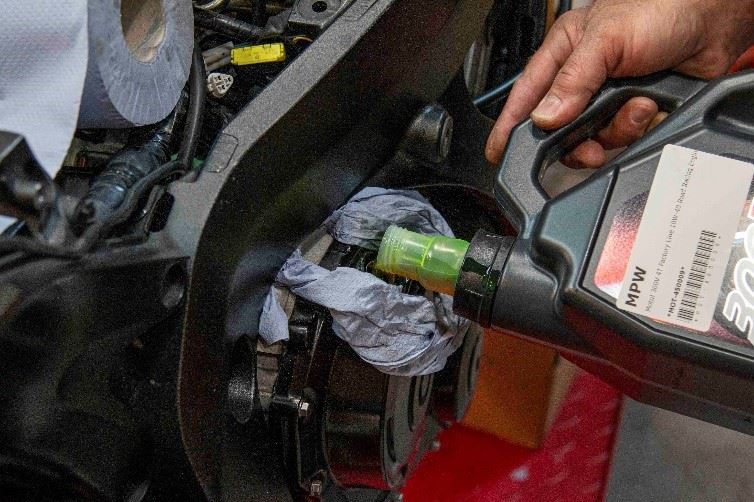
…the oil goes in and stays in
We are finally getting somewhere. But before we can push the starter button we need a battery. We charge up a Motobatt MBTX9U AGM battery, then slot it into the holder and connect the leads.
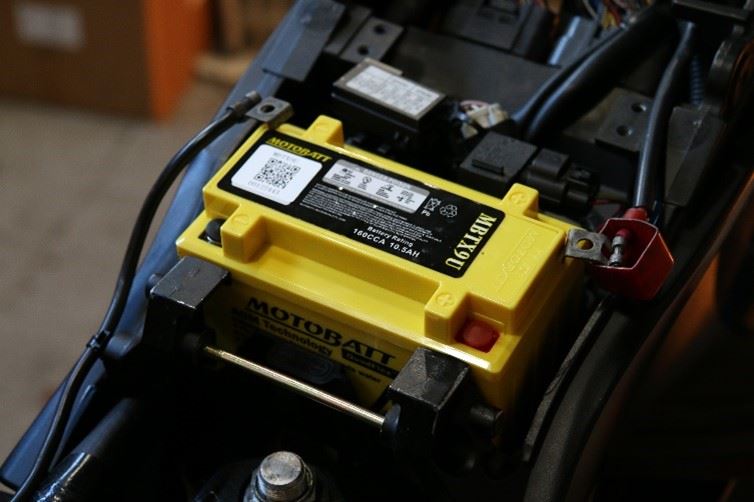
We have the power…
THE MOMENT OF TRUTH
If you have never undertaken a motorcycle project before, especially one that was started by others but not finished, and when you have no idea of the history of the bike or the state of the engine and how well it ran before, the moments before you turn the ignition on and push the starter button are full of hope and expectation, but also of trepidation. We take time to think over everything we have done, check the checklist and confirm everything has been checked, then check the checklist for anything we might have forgotten to add. But when it comes down to it, what can possibly go wrong? It has oil and coolant. It is not in gear. The worst that can happen is nothing. So we check the kill switch is in the run position, turn the ignition on and push the starter button. And guess what happens? Nothing. It’s a Suzuki. So we pull the clutch lever in and try again. It turns over. It catches. It fires. It runs. IT RUNS!
We are in an enclosed workshop on the first floor, with no window that opens, so before we have health and safety on our case we manoeuvre the bike off the ramp, through the warehouse to the lift and down to the car park, where we start the bike up once more. It runs a bit rough at first, and won’t idle, and I suspect gummed up injectors, but as the engine warms and the new fuel flushes through them it sweetens up and eventually settles to a nice idle. No oil leaks, no coolant leaks, no nasty mechanical noises, just a throaty growl from the Toro exhaust. I climb aboard, select first and go for a couple of circuits of the car park. Unfortunately a venture out onto the road is not possible as the bike is road illegal, and I value my licence and my job.
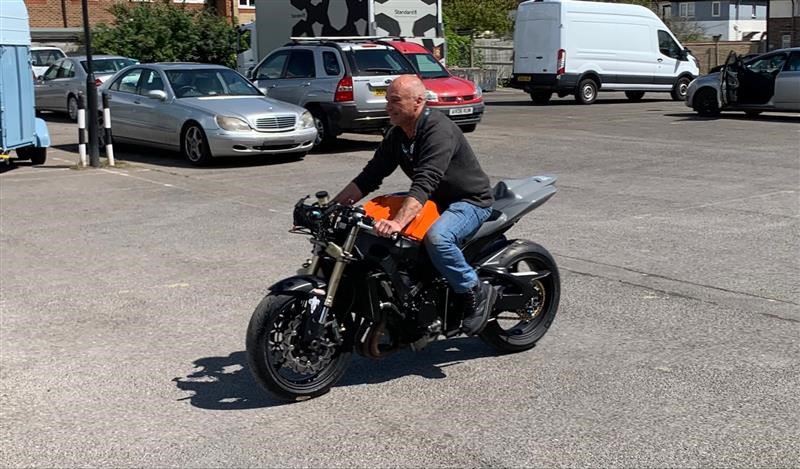
First ride - is that a smile on my face?
SOME FINAL TOUCHES
We decide that we should really fit a Boosterplug, a fairly new product that we now stock and that has been flying out the doors. The Boosterplug adjusts the signal from the intake air temperature sensor to fool the ECU into thinking it is cooler than it is so it enrichens the fuel/air mixture to cure the injection system of its weak mixture issues such as a poor idle and on/off throttle jerkiness. We like them because they are simple and they work, much like all of us.
And last but not least we fit the fairing and side panels back on and tart it all up with some more stickers. The MPW track bike project is now at the end of the build stage and is finally ready to run on a track. The question is where and when? We will keep you posted……
