MPW Track Bike: Part 6
MPW Track Bike: Part 6
For the story so far see our blog post MPW track bike: Part 5 (parts 1 to 4 revisited):
PROGRESS?
The MPW Track Bike Project is now getting the time and attention it deserves and progress is being made. Except that sometimes you need to take two steps back to take one forward……..
It is one of those things, taking on a project that someone else who is not available to talk to started but did not finish, and when you know nothing about their mechanical aptitude, once you find a problem with one thing, and then another, it makes you want to start from the beginning and check everything that has been worked on before. Just for peace of mind. After all, we are going to be taking this bike around a track or two, and for our own safety as much as anyone else’s you need to have confidence in the bike. And this is good practice for anybody who buys a second-hand bike.
TRIALS AND TRIBULATIONS
For example, the throttle action is sticky and stiff, and scarily so, not what you want on any bike anywhere let alone on a track bike on a track day. So to find out the cause of the problem we remove the quick-action throttle cam that was fitted way back when to find that it has not been fitted very well. Next, we remove the fuel tank and airbox and disconnect the cables from the throttle body, and find that the chosen cable routing kinks the cables, damaging them to the extent of not being usable. We disconnect and remove the cables and throw them away. Testing the throttle butterfly action with the cables disconnected tells us that the butterflies are sticking in the closed position due to being gummed up with old fuel residue, a testament to the fact that the bike hasn’t been run for a few years, and that the throttle linkage is dirty and making a nice grating noise. A few squirts of throttle valve cleaner soon solve these problems.

We remove the throttle bodies…

...to give them a good clean
But that still leaves us with the twistgrip and cable issues. From our warehouse, we grab the last Venhill universal quick-action throttle kit with cables to replace the one we will not be using, and because it is universal we can make the cable lengths to suit, which allows us to route the cables with a bit more free movement than the previous ones, avoiding future kinks. The routing is not ideal due to the angle of the cable bracket on the throttle body and the longer than standard elbows where the cables mount in the bracket, but with the new nipples soldered on and the cable free play adjusted the throttle opens smoothly and freely and snaps shut when released at all steering angles. First problem solved.
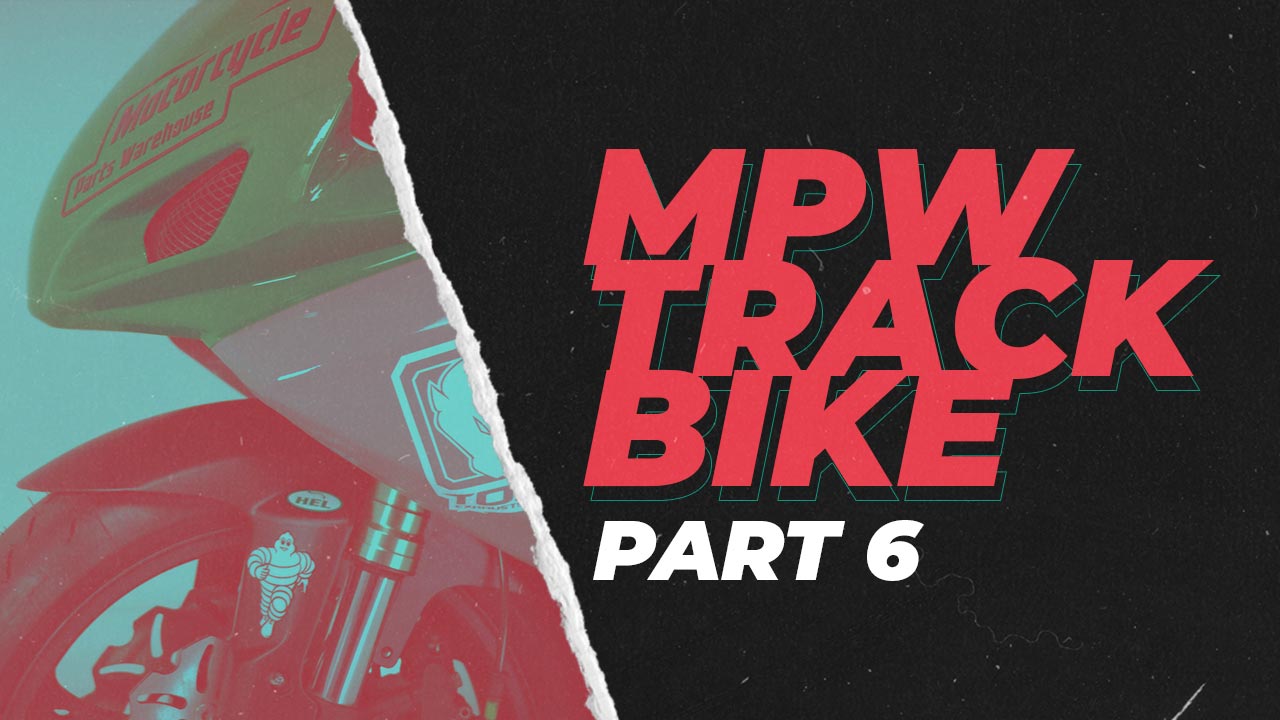
Soldering the cable nipples…
...connecting them to the throttle pulley…

...and adjusting the freeplay at the twistgrip
The next task is to fit the main coolant hose between the radiator and the pump, which for some reason had not been put on when the new radiator was fitted. So we remove the fairing panels to expose the works of the cooling system and find that not only had the hose been omitted, but there was no cooling fan and no coolant reservoir either! So instead of fitting the hose we remove the radiator. Twenty minutes on e-bay and we find the parts we need, and with permission granted to spend the money they are hopefully on their way….
We were told that the brake calipers had all been overhauled, and an examination of those at the front confirmed this, and that new EBC pads had been fitted. No fluid as yet, but we knew that. But the rear caliper was not only devoid of brake pads, it also had no piston and no seals. Now I know that some people never use the rear brake, but I prefer options. Back to e-bay…..
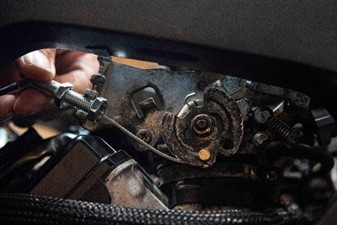
Just to be sure we check we have four spark plugs, then remove them for inspection. They are all new and looking good.
Just checking…
With the new quick-action throttle set-up, and because there is no need for lights and indicators, both sets of handlebar switchgear have been removed, but this does leave us with the minor issue of how to start the bike, something that was not previously considered. Not a problem really, as there are plenty of starter button options available, but we don’t stock one (which maybe we should), so it is back to good old e-bay…..
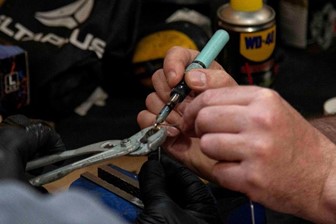
Another small but potentially troublesome find is that when the new bodywork was fitted part of the tail section was removed. Fair enough, and not a problem in itself, but the tip-over sensor, which detects if the bike has fallen over and cuts the engine if it has, was originally mounted on the bit that was removed and is now just sitting in the tray with some other electrical stuff, on its side. And if the sensor is on its side the bike will not start. Someone not aware of the function of such a small and innocuous-looking electrical unit that you can easily mistake for a relay might just leave it alone, or tuck it away, or mount it somewhere but not the correct way up. It is the sort of thing that could leave you scratching your head for hours. Luckily we spot it, and it is now secure, the correct way up.
PROGRESS!
It has been a good day’s work on the bike, not exactly what we had expected at the start of the day but even so we get a sense of satisfaction in knowing that we have resolved issues, cured problems, and come up with solutions. And that is one of the great things about working on and learning about your bike, it is rewarding, gives a sense of achievement, and one which will only increase when you are actually on the road or the track with the bike on song and all systems go. If it is something you want to do but are wary of getting involved in because you are unsure of your own ability, then ask for help, look for How-to videos, get a manual, buy some tools. Start simple but do start. At MPW our motto is Find, Build, Ride – find the parts you want, build them onto your bike, then go for the ride you deserve. And there is no better place to start than here.
So now we wait for our parcels and parts to arrive, and for another day in another week when we can fit them……and after we do that, we can add some fluids and charge the battery, and assuming we don’t find anything else to prevent us doing so, we can press that starter button. We’ll keep you posted - watch out for Part 7 of the MPW Track Bike Project.
