Paddock Stands - A Comprehensive Guide
Do I need a paddock stand?
Yes! But in all seriousness, it will depend on what you want to do. A set of paddock stands can be very useful for a multitude of bike maintenance tasks, storage over winter or track day use. If you have a bit of space to keep them, it is definitely worth investing in a set.
What types of Paddock Stands are there?
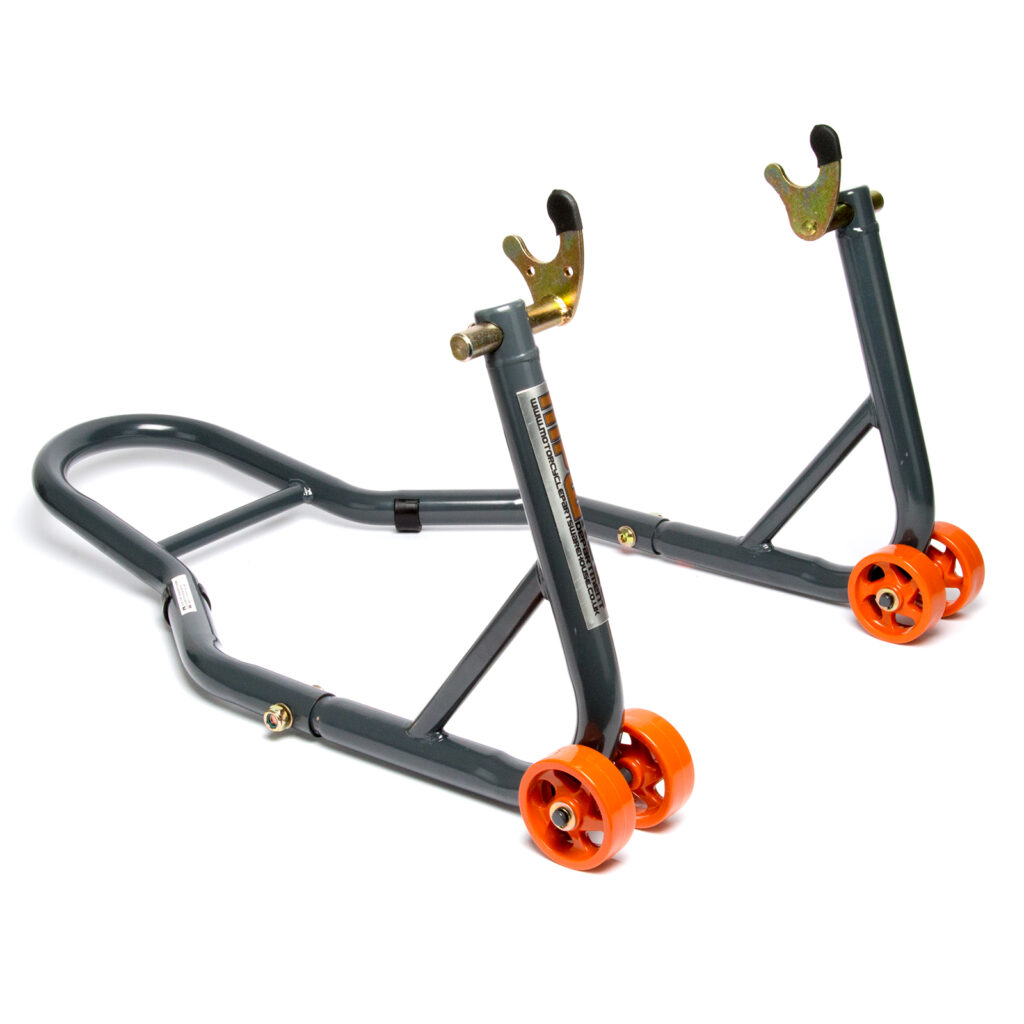
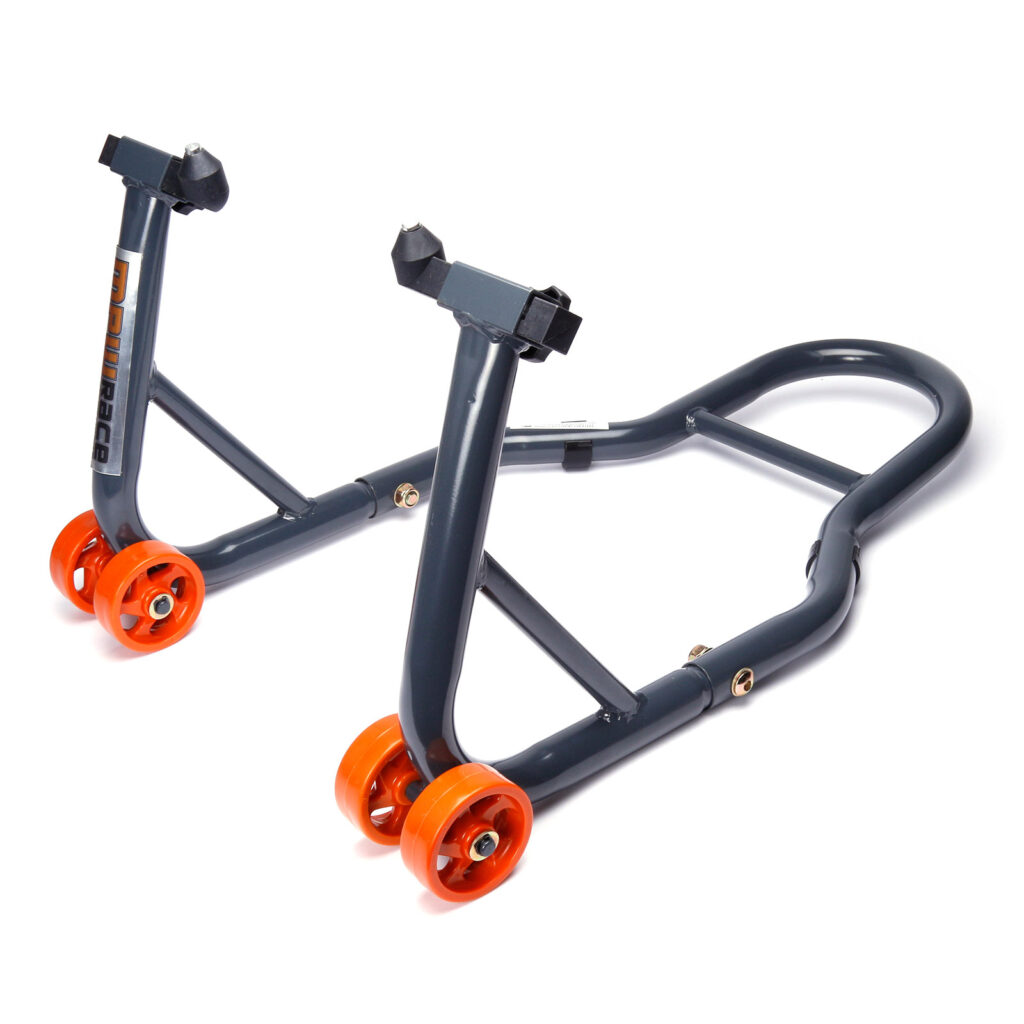
L-adapter (cup/cradle) Type
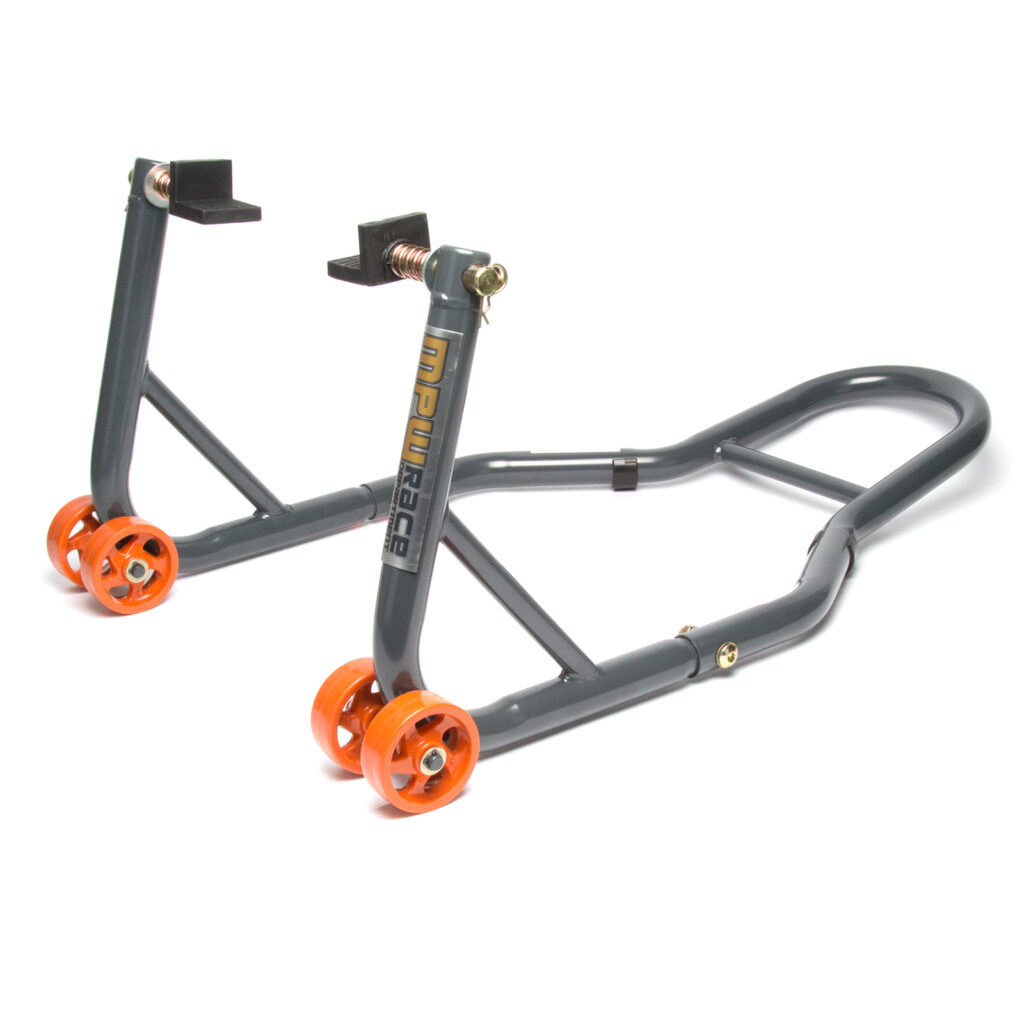
This is the most straightforward option in terms of stands and doesn’t require any other parts in order to get your rear wheel off the ground. Ideal if you don’t want to buy and fit bobbins, or you have multiple bikes you want to use it for. Technically, this is the most universal paddock stand you can get – though only universal for bikes with double-sided swingarms. It can be a little more tricky to locate on the swingarm compared to the V-adapter type, but it’s easy once you get the hang of it. The cups can be adjusted in a few different positions, allowing you to move them in or out to suit your specific swingarm.
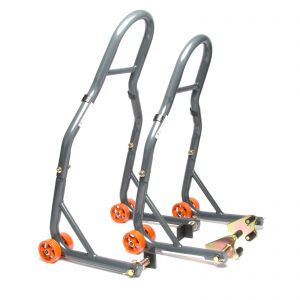
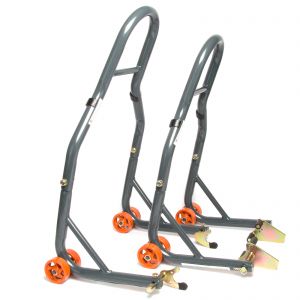
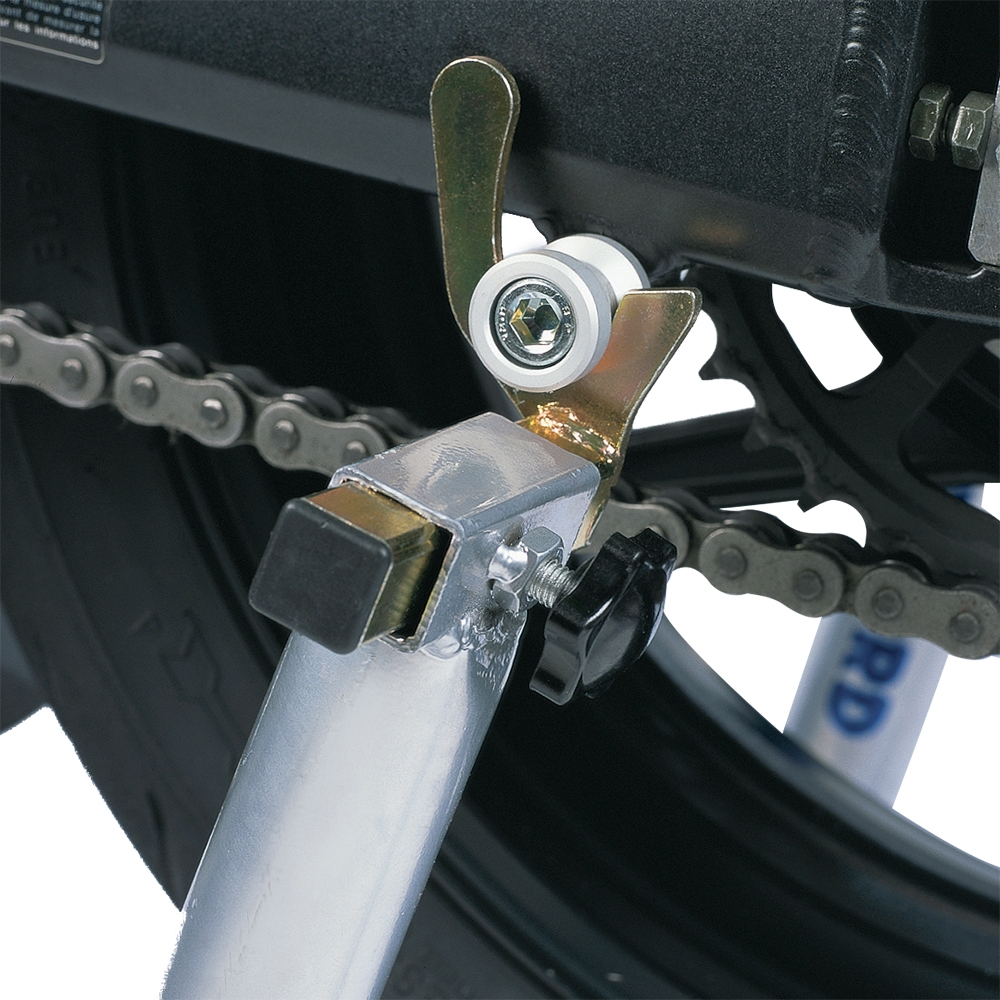
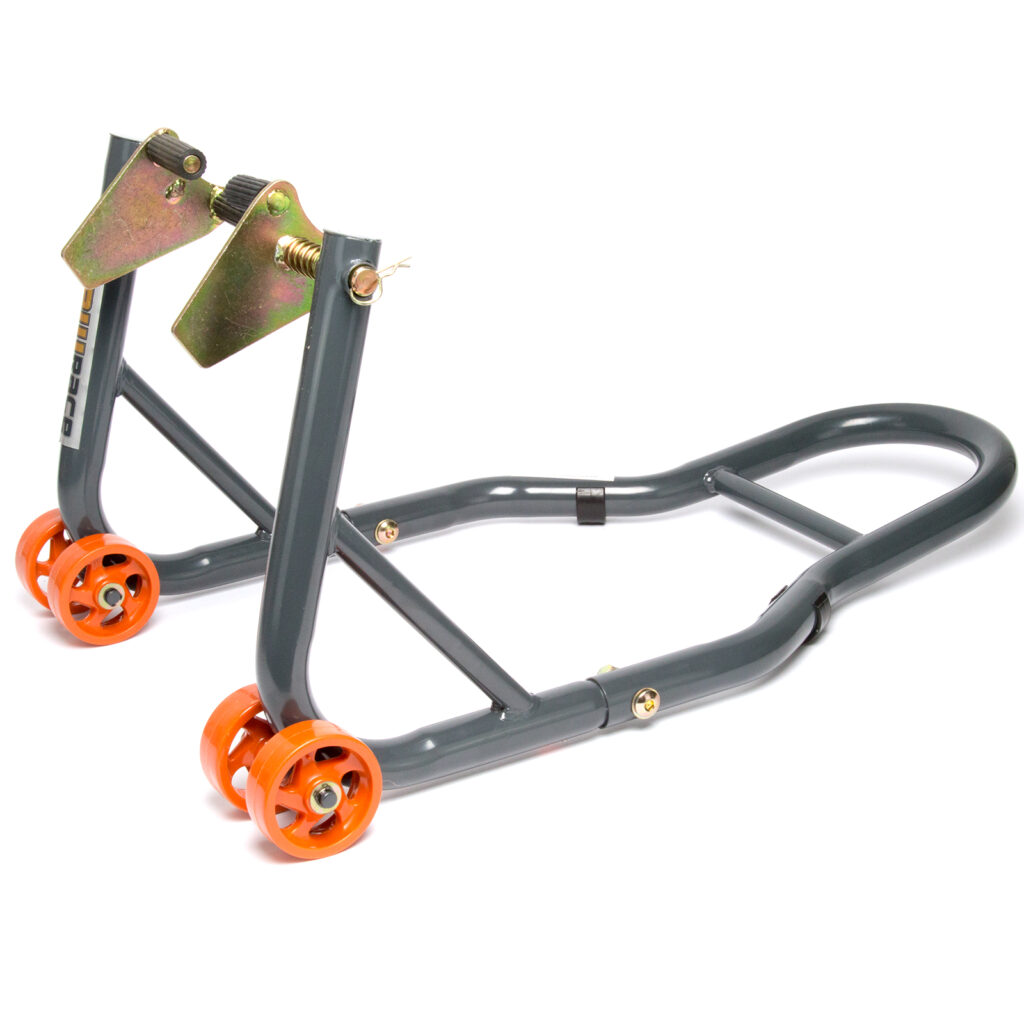
V-Adapter Type
These stands work in combination with Bobbins which will need to be fitted to the swingarm of your bike. Although you will need to buy bobbins, if you often put your motorcycle on a stand, the V-adapter type does make locating the stand easier and more solid than using the L-adapter style stand. Ideal for track day use! And who doesn’t like a set of R&G or Evotech bobbins?!
What's the difference between bobbins/cotton reels/spindle sliders?
Paddock Stand Bobbins
These are the most basic type of bobbins for use with V-hook paddock stands. Generally made of aluminium, these simply allow you to lift your bike on a set of stands. These fit into pre-drilled holes you may have in your swingarm, depending on the motorcycle. See R&G Bobbins here.
Spindle Sliders

Spindle sliders go through the axle (or spindle) on the rear of your bike - hence being called spindle sliders. They allow you raise your bike with a V-hook paddock stand, as well as being made of Polyoxymethylene or nylon to offer a level of protection for your swingarm. See R&G Spindle Sliders here. These are a good option if you don't already have threaded holes on your swingarm for cotton reels. It is worth noting that you won't be able to remove your rear wheel without first taking these off - making chain adjustment a bit more of a fiasco.
Cotton Reels

Like spindle sliders, cotton reels perform the dual role of acting as a paddock stand bobbin, as well as offering some protection for your bike. These fit to the threaded holes on your swingarm - if you have them (not all bikes do). Generally these will be either 8mm or 10mm - it's worth checking your swingarm to be sure which size you need. See R&G Cotton Reels here.
Single Sided Paddock Stand
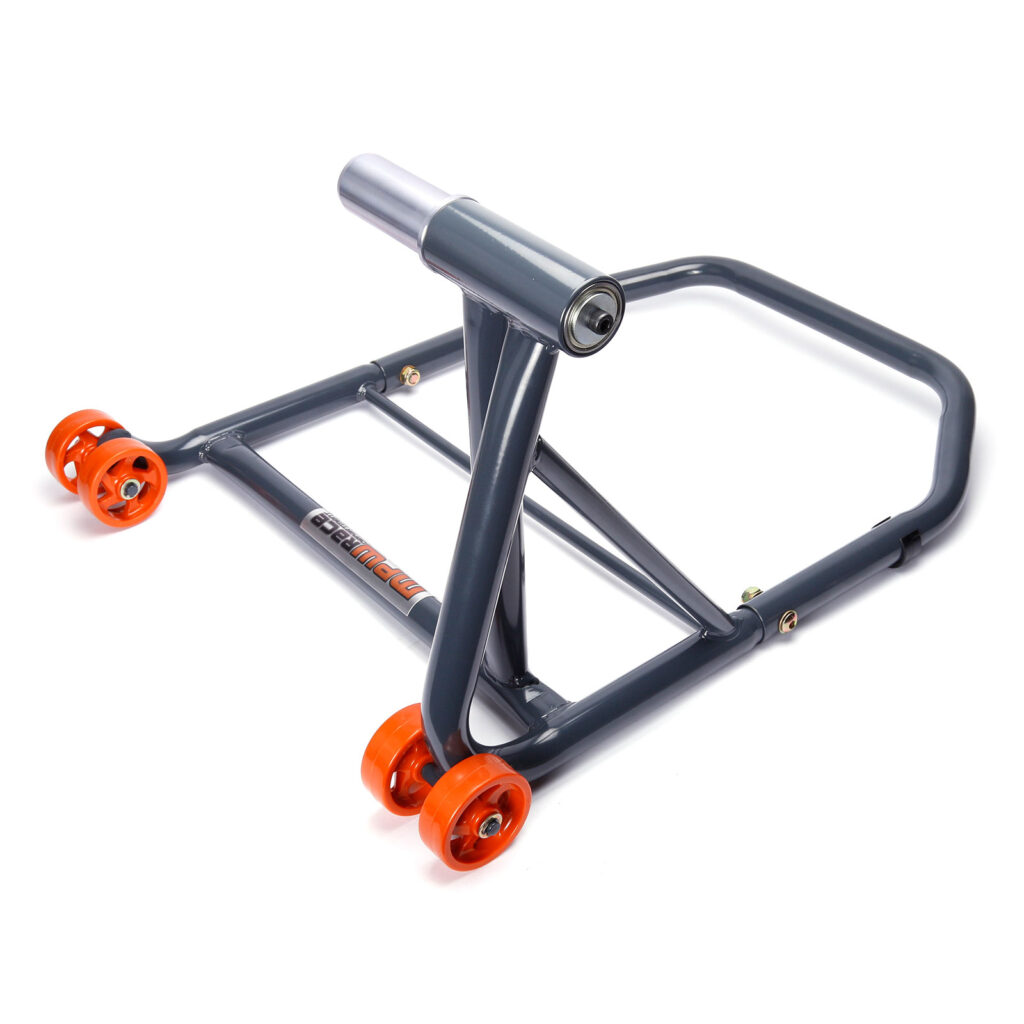
Motorcycles with a single sided swingarm require this type of stand. The size of the adapter you need will depend on your motorcycle – we currently stock a range of options on the MPW website, for both right and left single sided swingarms.
Right – 30.5mm (BMW), 52mm (BMW)
Left – 28.4mm (Honda), 25.8mm (Ducati), 31mm (VFR), 42.5mm (MV), 30.5mm (BMW), 40.7mm (Ducati), 53mm (BMW), 27.4mm (triumph/KTM), 38.5mm - (Ducati)
Front ‘Cradle’ Style Paddock Stand
This is the most basic style of front paddock stand, and also the most universal. You can fit this to the majority front forks. If you are wanting to store your bike, or use a set of stands for cleaning, these will do the job. They are a bit more awkward than the other front stands in terms of using them with tyre warmers. For more complex maintenance, you’ll need one of the other front stands.
Front Pin/Spigot Style Paddock Stand
This front paddock stand engages underneath your front fork. As well as potentially giving a more stable interface with your bike, this stand also allows easier access to your spindle/axle bolt, allowing you to remove the front wheel with ease if needed. With less of an adapter to get in the way this stand is also a bit easier to use in combination with tyre warmers. The pin width is adjustable to allow for fitting to a wide range of motorcycles. Once in the correct position, they can be tightened down for repeat use.
Headstock Paddock Stand
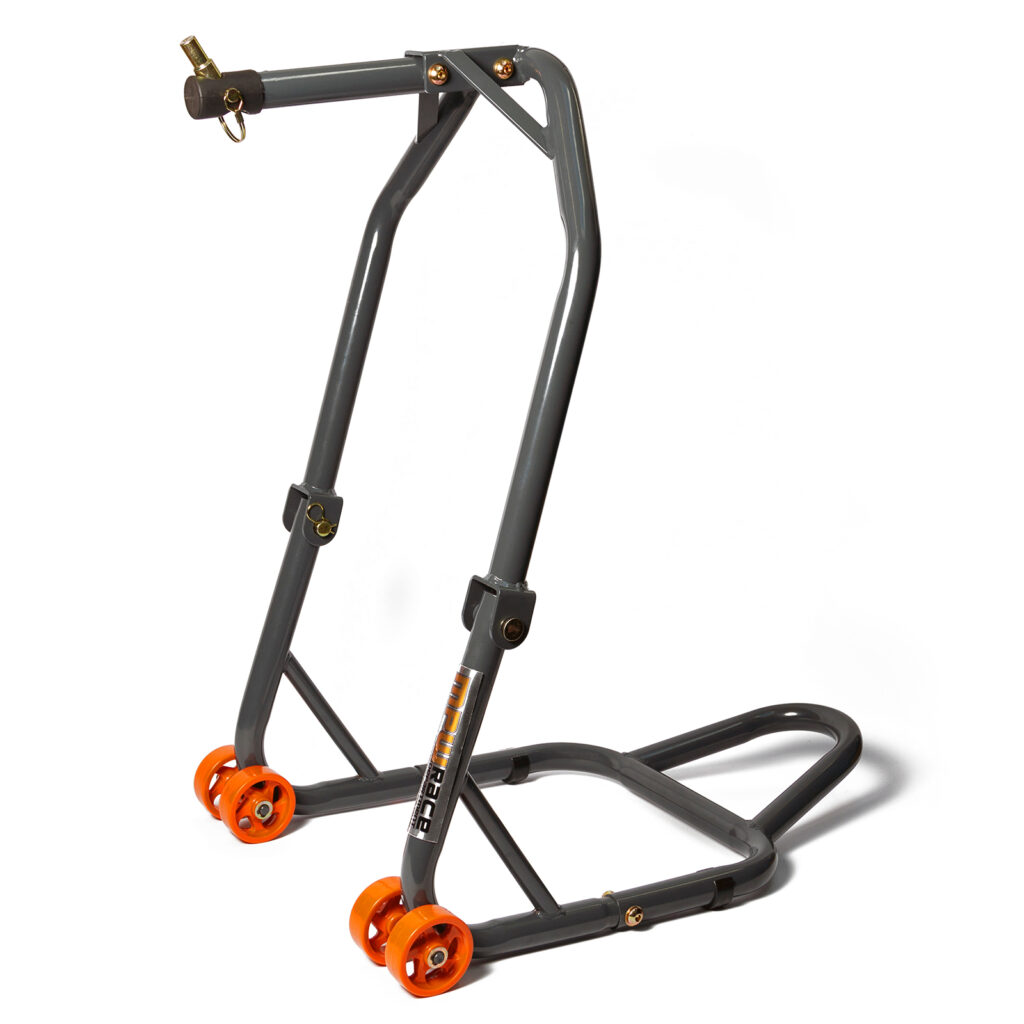
This is the ultimate option in terms of front paddock stands. By engaging with the bottom of the triple clamp, your forks and wheels are completely free of the stand. This allows the best access for tyre warmers and also allows you to remove the front wheel and forks. Ideal if you are changing fork oil, wheel bearings or using it for regular track days. The headstock stand comes with a range of pin sizes to allow you to get the correct fit for your bike.
What are paddock stands used for?
Maintenance
If you are just looking to make lubricating your chain easier, you can get away with having an L-style rear paddock stand – this does not require bobbins in order to lift the rear wheel. If you have a single sided swingarm, such as you’ll find on a range of Ducati models or Honda VFR’s, you’ll need to buy a single sided paddock stand.
Having a set of stands (front and rear) can be very useful for cleaning your bike’s rims, as well as checking the tyre pressure while you’re at it! Being able to spin the wheels makes life a heck of a lot easier for chain lubrication or finding a tyre valve!
Advanced Maintenance
If you want to remove your front wheel or service your forks, you’ll need a headstock stand as well as a rear stand.
Storage
If you are looking to store your bike for an extended period of time, it is advisable to use a set of paddock stands to elevate the bike off the ground to avoid flat spots on the tyres. You can use any of the stands in the MPW range for this job. Any rear stand can be paired with any of the front stands – the choice is down to your preference.
Track Day/Race Use
Any of the range of MPW stands can be used for track days. If you are a more serious racer and need to use your stands extensively, it is recommended to use a headstock stand and a V-adapter style rear stand. It is also possible to buy adapters for the rear stands separately, so you can convert an L-type stand to a V-type, and vice versa.
How does a motorcycle paddock stand work?
Paddock stands work by engaging with specific points on your motorcycle in order for you to be able to pivot the bike up and off of it’s wheels. Generally this involves the stand lifting your bike from a point (or points) on your swingarm and your front forks or triple clamp.
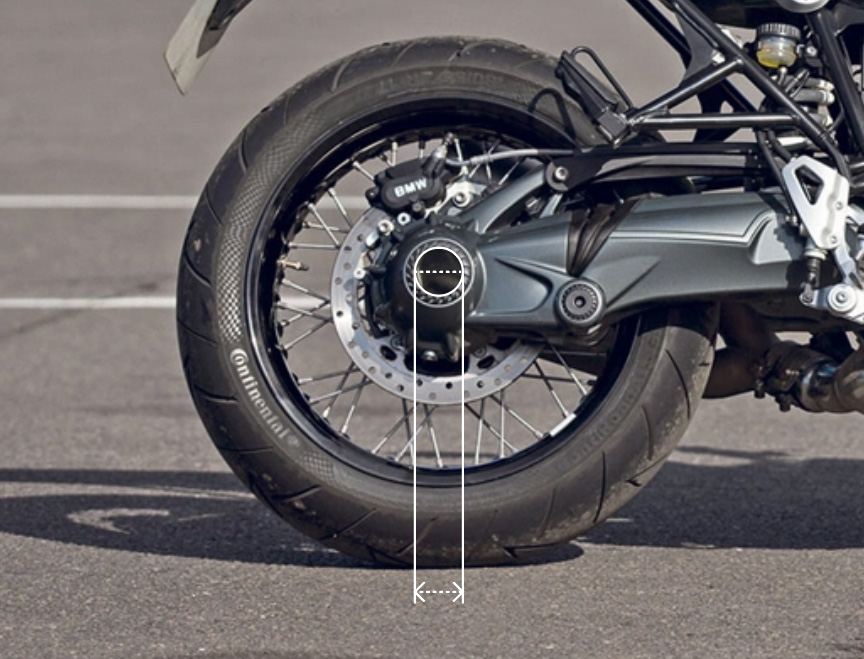
Which Single Sided Paddock Stand Do I Need?
Before purchasing a single sided stand, it is worth confirming the size of the recess in your swingarm, using a set of vernier calipers. Measure the diameter of the aperture in your wheel hub. This will give you the diameter of the pin that you need to order:
Our single sided stands have fitment associated, but this should only be used as a guide. Measuring first will ensure you know you are getting the correct pin. Depending on your model, you will need either a right or left handed stand. Make sure you are buying the correct one for your bike! It is well worth checking forums or sending us an email if you are unsure.
How do you put a motorcycle on paddock stands?
Firstly, regardless of which stands you are using, make sure your bike is on a level, solid surface. If the ground is not level, it is highly likely you will drop your bike. Some people like to stand the bike up and then engage the rear paddock stand – if that works for you, go for it.
While you are getting the hang of using paddock stands, I think it is easier to use the methods described below, especially if you are working on your own. Trying to balance a motorcycle with one hand whilst fitting a paddock stand in position with the other isn’t as fun as it sounds! Especially if you have a heavy bike. It is also very beneficial to have someone on hand to help you out. They can hold the handlebars to ensure the bike isn’t going to go sideways when you are trying to get it onto your stands. Once you get a feel for putting your bike on the stands, it's a piece of cake. But it takes a couple of tries to become confident! See our video on how to use paddock stands here.
L-type/Cup Rear Stand
With your bike on the side stand, align the left hand cup with the left hand side of the swingarm. Before putting the bike on the stand, it pays to see if the right hand side is aligned and spaced correctly. The cup should sit up against the swingarm when in use. If there is a gap, adjust the adapter to be close to your swingarm. As you push down on the stand, the bike will begin to stand up and the right hand adapter will meet the other side of the swingarm. It is helpful to hold the tail unit of your bike with your free hand or have an assistant to keep an eye on it as you engage the stand. Once both L-adapters are holding both sides of the swingarm, you can push the handle fully to the floor. Your bike is now on the stand!
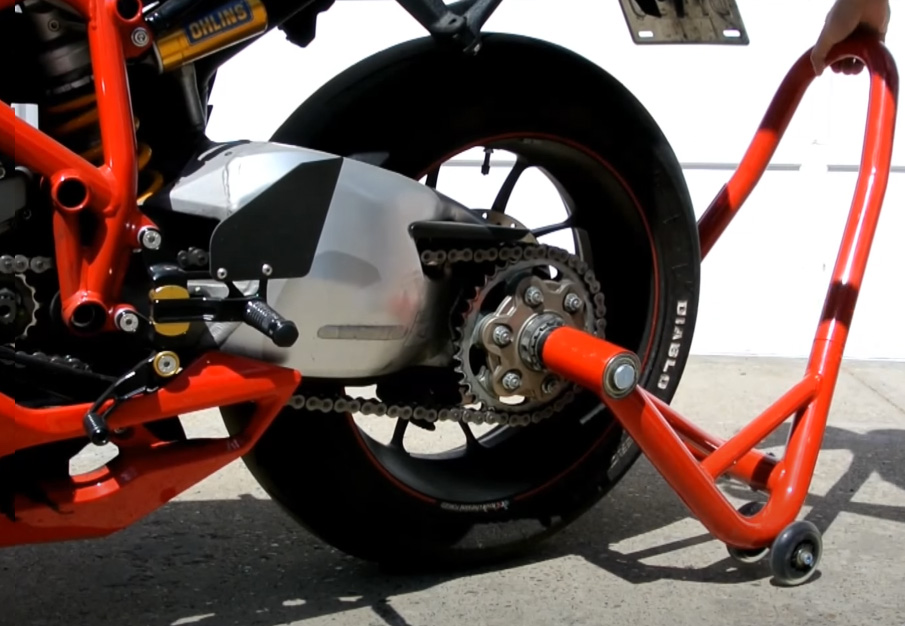
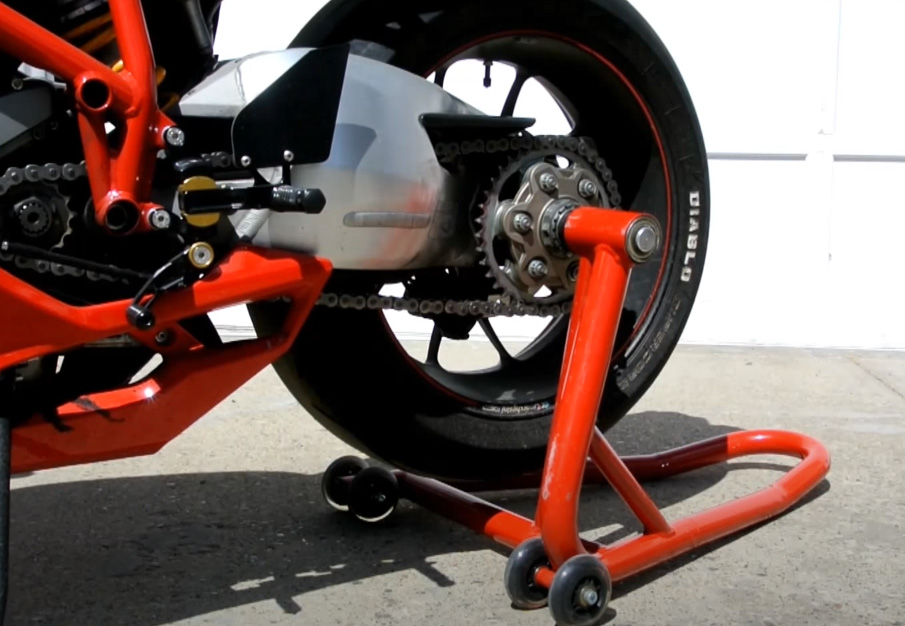
V/Hook-type Rear Stand
This is similar to the L-type stand, except that you are aligning the left hand hook with the bobbin on that side of the swingarm. You will also need to have bobbins fitted to your motorcycle first! It is worthwhile to adjust the hooks to be in line with the bobbins ahead of putting the bike on the stand – you can eyeball this by lining the stand up with the rear of your bike and adjusting the position of the hooks.
Once you hook the left hand bobbin and push down, the right hand hook should align with the bobbin on that side and slot into place. If anything is out of alignment, return the bike to the side stand and adjust the hooks until they are aligned correctly. With the hooks in the correct position, push the handle fully to the floor. Your bike is now on the paddock stand!
Single Sided Paddock Stand
Once you have the correct sized pin and the stand is assembled, align the pin with the hole in your hub and insert it fully.
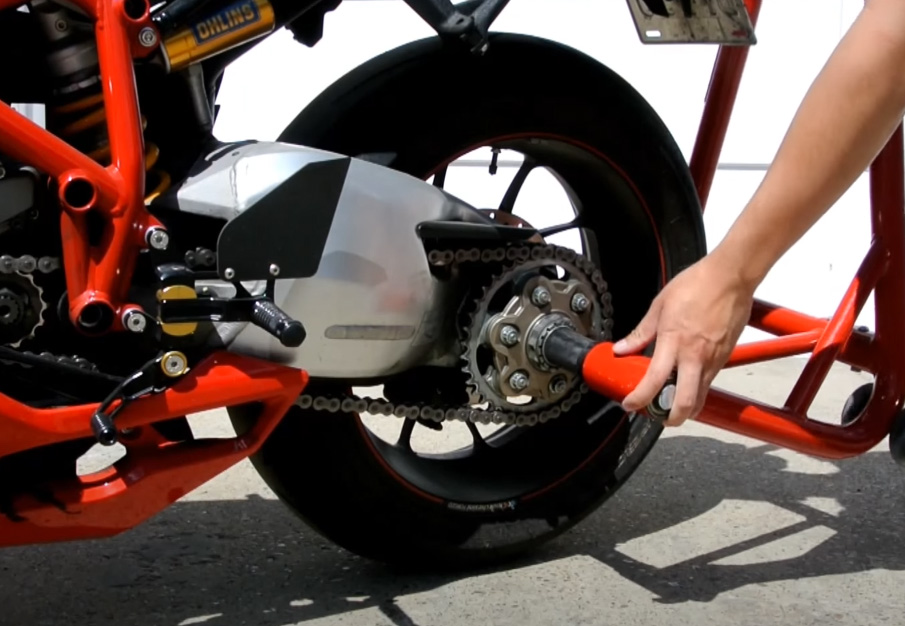
With the wheels of the stand on the ground, push down on the handle to lift the bike off the rear wheel.
Cradle Style Front Stand
Once your bike is on the rear stand, align the prongs of the front stand with your forks. You may have to move the R clip and relocate the adapters in order to fit the forks correctly. Position the prongs underneath the forks and push down on the handle. Your bike is now suspended on both stands!
Pin/Spigot Style Front Stand
Have a look at your forks and align the pins on the stand so that they will sit in the middle of each fork when in position. Tighten the turn screws on both sides. Locate the pins underneath the forks – you should feel the pins locate securely. If not, double check they are in the correct position. Once happy, push the handle down to the floor. Your bike is now on both stands!
Headstock Front Stand
Have a look at the triple clamp of your bike, and test fit the pins that come with the stand to find the correct sized one you need. Attach this pin to your stand. With the stand folded, position the pin in the recess of your triple clamp. Push down on the handle to extend the stand and lift the front of the bike off the ground. Your bike is now on both stands!
How do you take a motorcycle off paddock stands?
To remove the paddock stands, make sure your side stand has been lowered first! I tend to leave mine down while the bike is on stands to ensure I don’t forget about it. If you are using a front stand, make sure you remove that one first!
Front Stand Removal
With any of the front stands, regardless of type, you just need to pull up on the handle, and the front of the bike should lower to the ground. ALWAYS TAKE THE FRONT STAND OFF FIRST. With the headstock stand, I tend to hold the upper folding section to make sure it doesn’t bounce off any fairing/mudguards as you remove it.
Rear Stand Removal
Grab the handle and slowly lift directly upwards whilst holding onto the tail unit/pillion seat to keep the bike stable. Gently guide the bike over to the left and onto the side stand as you fully disengage the paddock stand.
What is the weight limit of a paddock stand?
Each MPW Paddock Stand is rated to carry 200kg. This does not mean that the weight limit of the bike is 200kg. If you are only using a rear stand, a lot of the weight will also be distributed to the front wheel. If you are using a pair of stands, they can carry a combined weight of 400kg – which will accommodate the vast majority of motorcycles.
Which stand do I use first?
ALWAYS engage the rear stand first. Due to the fact that your front wheel can turn, your bike is liable to drop to one side if you try putting the front stand on first! It is also helpful to have another person on hand the first few times you put your bike on the stand, just to be sure nothing is going to go sideways! Essentially you put the rear on first, front on last. Front off first, rear off last! Remember that and with any luck you won’t have any paddock stand related mishaps. If you do, we always sell replacement mirrors/side cases/bar ends/! :D
Can I sit on the bike when it is on stands?
Technically, as long as the total weight is within the limit of what the stands can hold, yes. Though we wouldn’t necessarily recommend it. Some manufacturers of cotton reels advise against sitting on the bike whilst on stands, so be aware if anything does fold in half, on your head be it.
How do I assemble Paddock Stands?
When you order a set of MPW paddock stands, they will be flat packed in a box, and require assembly. This is pretty quick and easy – you should only need a 17mm spanner and a 6mm Allen key.
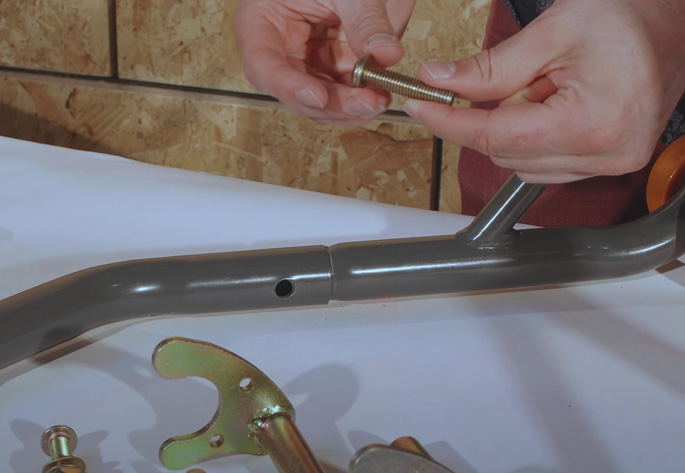
Slot the legs of the stand into the handle and put a bolt through each side. Fit a washer and nut and tighten down:
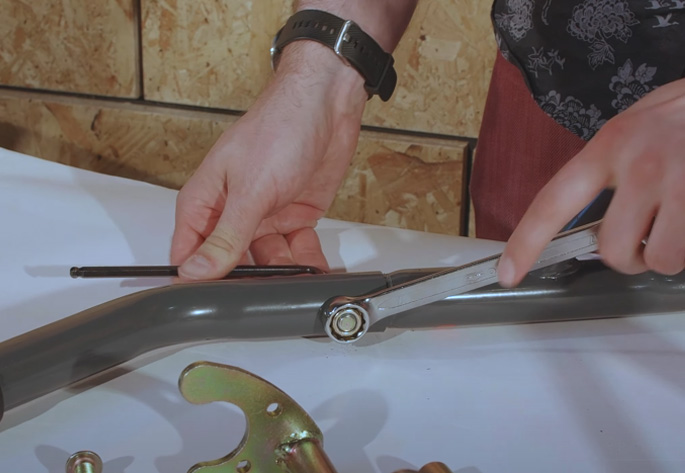
Depending on the type of stand, you need to fit the adapter into each leg:
Fit the R clip to hold the adapter in position. The adapters are adjustable, so you can pin them in a few different positions depending on what you need for your bike. Some of the adapters also have a grub screw you can use to tighten them in position.
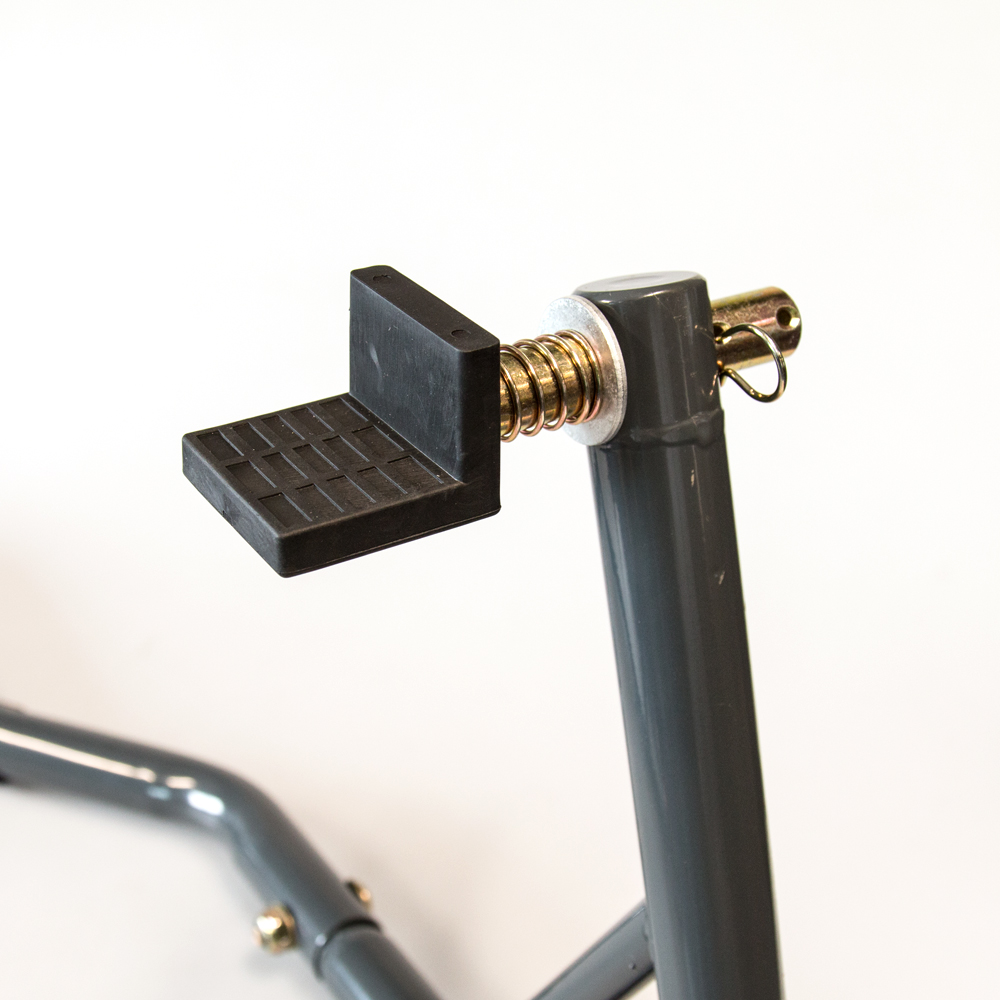
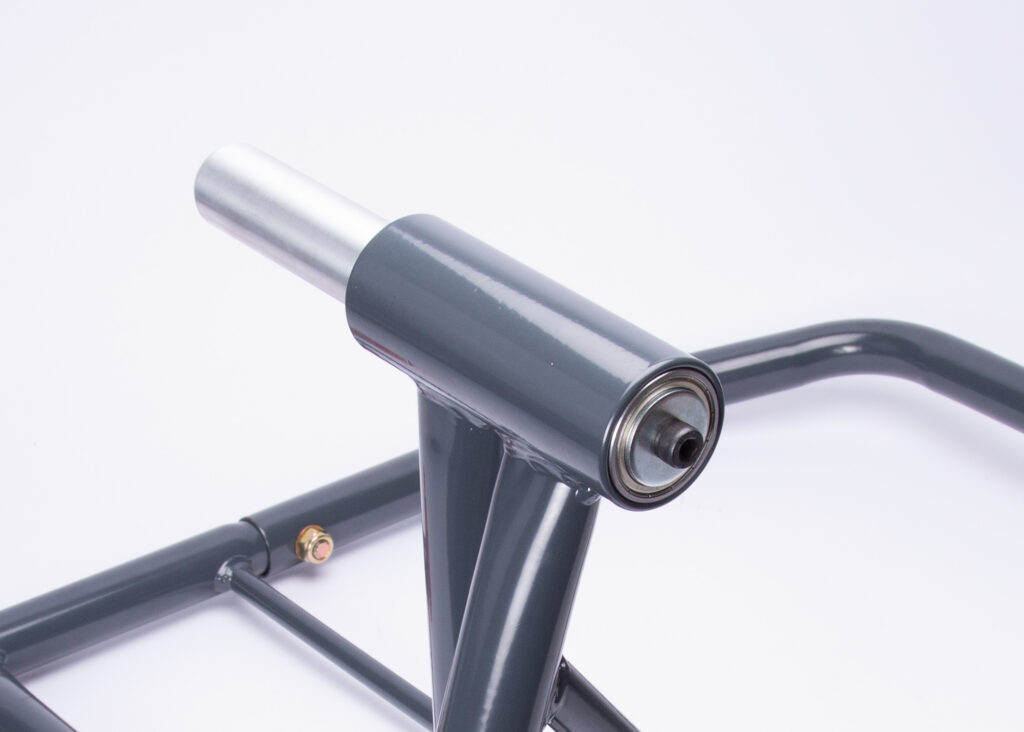
Single Sided Paddock Stand
Insert the upright into the frame handle. Align the bolt holes in both sections and fit the three nuts, bolts and washers. Insert the bearings into the top of the stand. There is a ridge on either side so you can only push them in as far as they need to go.
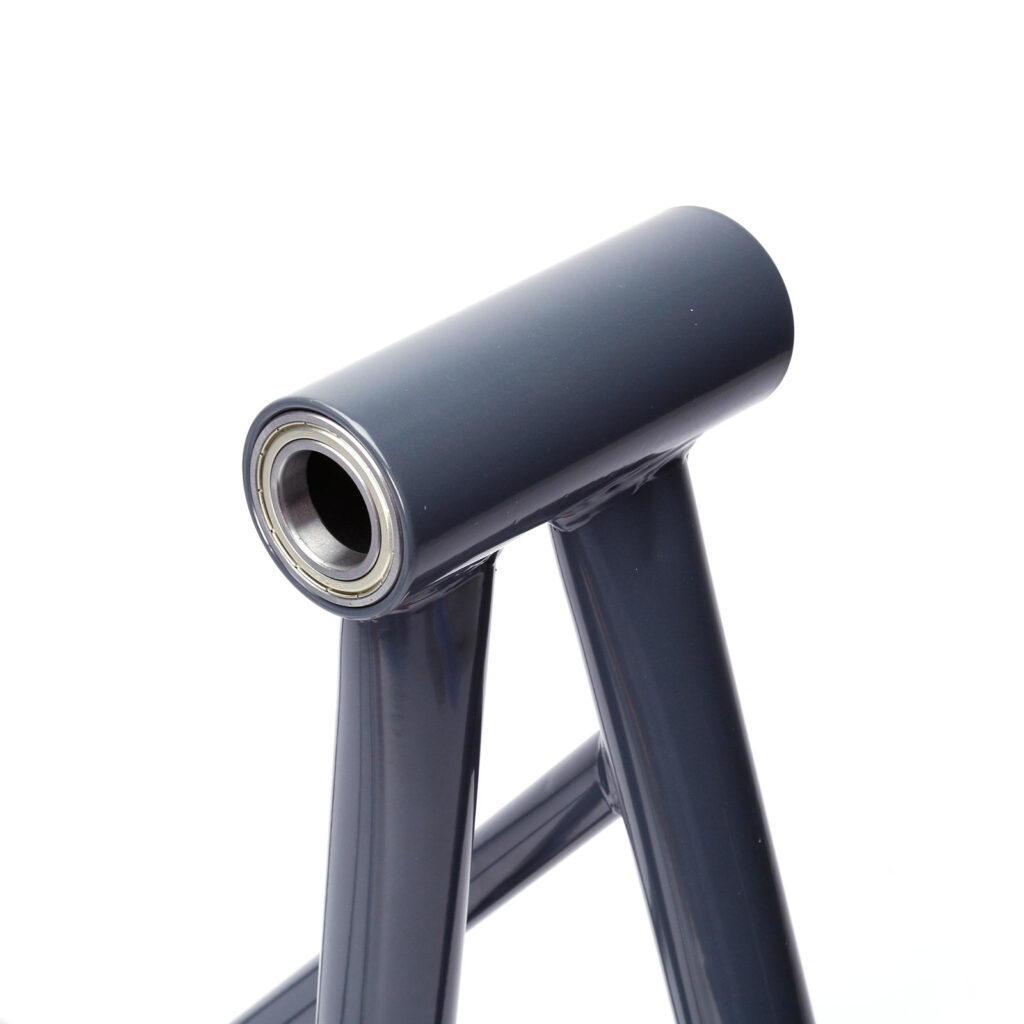
Put the pin through the bearings and hold it in place with the washer and bolt on the backside. Your stand is now ready for use.
Hopefully, that's about all the information you'll ever need on paddock stands! If you have any questions, feel free to get in touch with us. Make sure to check out or full range of paddock stands and accessories here, as well as all of our track day essentials.
Related Products