Motorcycle Chains and Sprockets: The Need-to-Knows – Part Two
Motorcycle Chains and Sprockets: The Need-to-Knows – part two.

Every motorcycle has a final drive system that transfers power from the engine and gearbox to the rear wheel. Of the three methods used a chain and sprockets is the most common. Shaft drive and belt drive systems offer advantages, but they also have their drawbacks, and like most things in life and on motorcycles everything is a compromise. The chain and sprockets have a hard life and are among the most abused components on a motorcycle, not only by the bike itself due to the forces put on it, but also sometimes by the owner, some of whom are negligent in the amount of care they give. Caring for your chain and sprockets is not difficult or expensive, and doing so will massively increase their life.
Here in part two of our two-part feature on chains and sprockets we look at how to take care of and maintain your chain and sprockets. In part one we look at chain and sprocket types and sizing and the effects of sprocket size on the gearing ratio.
CHAIN AND SPROCKET CARE AND MAINTENANCE
The cleaning and lubrication of an unsealed chain, as used on many old bikes and some small capacity bikes, needs to be done every 200 miles (or more often in the wet), while on sealed O-ring, X-ring and Z-ring chains it needs to be done every 300 miles. That is because on an unsealed chain the lubricant needs to penetrate right into the inner areas between the pins and the bushes, whereas on a sealed chain grease is applied at the factory and is then sealed in by the rings when the chain links are assembled and stays there for the life of the chain. All cleaning and lubricating products used on sealed chains must be compatible with the seals, otherwise it could destroy them. And the seals themselves must be lubricated as they are constantly rubbing against the sideplates as the chain moves.
Cleaning and lubricating the chain after the bike has been ridden so it is warm improves the flow and penetration of both the cleaner and the lube that follows it, however in practice by the time you have got your kit off, due to its large surface area it is likely the chain will have cooled a bit when you apply the cleaner, and a lot more by the time the chain is clean and dry and you can apply the lube. However if the chain does not need cleaning and you are just applying some fresh lube a bit of heat in the chain does help.
Applying the chain cleaner and lube is best done with the rear wheel off the ground so you can turn it. As it is a regular maintenance task, if you have a bike without a centrestand, a paddock stand is a worthwhile purchase, even if you don’t use it for anything else (but you will of course, most things you do on a bike, including cleaning it, are easier with the bike upright rather than leaning over). You need to shield the tyre and the brake caliper and disc so none of the cleaner and lube gets onto them.
Cleaning the drive chain
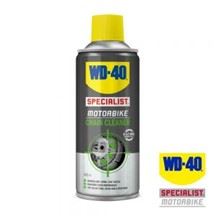
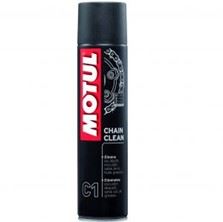
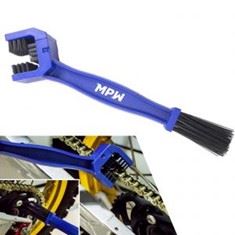
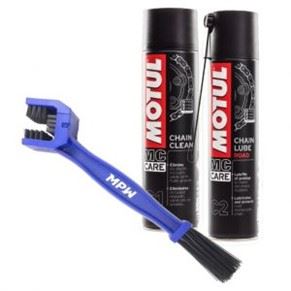
Using a dedicated chain cleaner along with a specially shaped chain cleaning brush is a sure way of achieving a good result when cleaning a chain. The cleaners mostly come in spray form. For convenience one of the best things to do is to buy a chain maintenance kit, consisting of can of cleaner, a brush and a can of chain lube – see https://motorcyclepartswarehouse.co.uk/servicing/lubricants-fluids/chain-lube.html. Follow any instructions provided with the product. Alternatively you can use kerosene (paraffin), which works very well. If you have a sealed chain, that is an O-ring, X-ring or Z-ring chain, don’t use petrol or any de-greaser, solvent or other cleaning agent that may harm the sealing rings, get into the sealed parts and strip out the grease. And do not use a jet wash to clean the chain.
Apply the cleaner, allow it to penetrate for a few minutes, then use the brush to work the dirt loose. Apply some more cleaner to flush the dirt and old lubricant off, then wipe it all off and dry it with a clean rag. Repeat if necessary. While you are cleaning the chain check for any kinked and corroded links, and if you can’t free them up after cleaning and lubricating, or if any damage is evident, fit a new chain. From time to time it is best to remove the front sprocket cover and clean out any accumulated gunge from around the sprocket and in the cover, and to clean the swingarm, chain guide and guard, and anything else that that needs it. Make sure all the cleaner has been removed and the chain is dry before lubricating it.
Lubricating the drive chain


If the chain is dirty clean it before lubricating it, as described above.
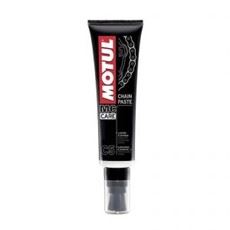
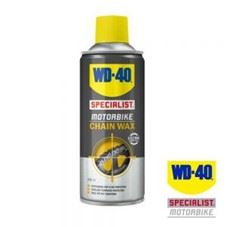
Using a dedicated chain lubricant in spray form is the best way to effectively lubricate a chain as it contains a solvent to help the lubricant penetrate. The solvent quickly dissolves, and the lubricant thickens and becomes tacky so it does not get flung off as the chain turns. Whether you use a lube or a wax type is a matter of choice, but many riders have both to hand and apply the type best suited to seasonal conditions. If you prefer to avoid sprays a chain paste works very well and the brush applicator it comes with means the paste can reach where it is needed, but it does take longer to apply.
Apply the lubricant to the top of the lower run so that when the wheel turns centrifugal force will help it to penetrate. Apply the lube to the rollers and along the lines of plate overlap so it goes between the plates and onto the seals, but make sure the whole chain gets some coverage to prevent corrosion. Do not apply too much lube as the excess will get flung off and wasted, and any excess sticking to the chain will attract dirt and grit. Wipe off any excess.
The final task is to check around for any lube on the tyre and brake disc and to clean it off. Lube on the tyre will be easy to see. Lube on the disc is harder to spot, so even if you can’t see any use a dedicated brake cleaner and a clean rag to wipe all round both sides of the disc.
Checking drive chain slack
Chains need some slack in them for free movement of the links and to cater for the up-and-down movement of the swingarm (the amount of slack changes as the swingarm moves due to the offset between the swingarm pivot point and the front sprocket). The question is how much slack is the right amount, and getting it right is important. A tight chain will quickly wear the sprockets, can affect the action of the rear suspension, and stresses the transmission output shaft bearings. A loose chain is in danger of coming off a sprocket.
And you can’t just set the correct amount once and relax - chains stretch slightly with use due to wear of the pins and bushes, and the extra slack created needs to be taken up regularly. How regularly depends on many things, including the type of bike, the power and torque characteristics of the engine, how the bike is ridden, the quality of the chain and sprockets, and the level of care and maintenance applied.
If the chain is dirty clean and lubricate it before measuring the slack, and make sure the chain has no kinked links, which will effectively shorten it. Links can become kinked due to corrosion, so keep the chain clean and lubricated as described above, and work any stiff or kinked links free if possible, or fit a new chain if not.
The recommended amount of slack and how you should measure it varies from bike to bike. The chain gets tighter as the suspension compresses and will be tightest when the centres of the front sprocket, swingarm pivot and rear axle are in a straight line. If you measure slack with the bike on the centrestand and then put it on the sidestand and measure the slack again, the result will be different – there will be less slack with it on the sidestand. So you need to consult your handbook not only for the amount of slack but also for how to measure it. If you don’t have a handbook there should be a sticker somewhere on the bike, usually on the swingarm, which tells you the amount of slack required, and hopefully how to measure it.
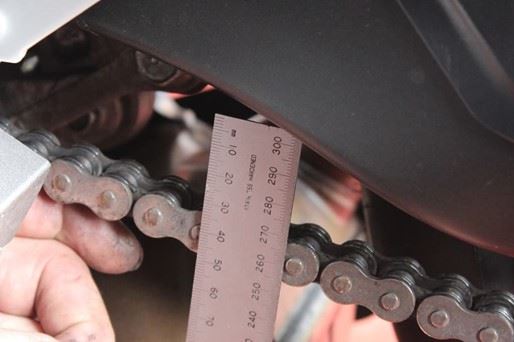
If you don’t have access to any bike-specific information then as a rule you should measure the slack with the bike on its sidestand, and there should be around 30mm of slack for a road bike and 45mm for an off-road bike. If you are not sure then ask a dealer, or err on the side of having a bit too much slack rather than too little. To measure the slack all you need is a ruler, but there are some dedicated chain slack measurement tools available that make the process easier.
Chains will rarely wear evenly and can get tight spots, especially as the chain gets older, and so the amount of slack in one section of the chain may be different to that at another. Chain slack must be measured at the tightest point of the chain, and that is also where you will make any adjustment if needed. By adjusting the chain at its tightest point you are not in danger of having another part of the chain over-tight. Finding the tightest point is best done with the bike on its centrestand or a rear paddock stand so the rear wheel can be turned. Turn the wheel slowly and move the centre of the lower run of the chain up and down until you find the section with the least amount of movement and mark this point. If the chain is not very old there may not be a tight spot.
Now support the bike as specified in the handbook or on the label, or on its sidestand if no information is available. Make sure the transmission is in neutral and the tightest point is in the centre of the lower run. Place a ruler against the outer side of the lower run of the chain mid-way between the sprockets and against a solid point, say the underside of the swingarm, so it cannot move and alter your initial reading point. Push down lightly on the chain and select a good reference point on it, either the top or bottom of one of the sideplates or the centre of one of the pins, your choice. Note the reading on the ruler that your refence point on the chain aligns with. Now lightly push the chain up to its limit and note the reading on the ruler that the chain reference point now aligns with. Calculate the difference between the two readings to obtain the amount of slack. So if the reading on the ruler with the chain pushed down is 50mm and the reading with the chain pushed up is 15mm the amount of slack is 35mm.
For details on how to adjust your chain refer to your handbook or manual.
Checking drive chain and sprocket wear
As mentioned earlier the chain will stretch slightly with use due to wear of the pins and bushes, and while slack can be taken up to compensate for this there will come a point where the chain has worn to the extent that a new one must be fitted. But how do you know when that point is reached?
Some manufacturers provide a chain stretch limit figure, which is the maximum permissible length for a specified number of chain links, and to measure this you need to hang a specified weight to the lower run of the chain and then measure it with a ruler. Honda usually have a red zone on a sticker on the chain adjustment marker on the swingarm, and when an index line on the marker enters the red zone the chain is worn. Ultimately if you run out of adjustment then your chain is well worn, assuming it is the correct length.
Having said all that there is one tried and tested and very simple method of checking the amount of wear in your chain, and that is to try to pull the chain away from the rear sprocket at its rearmost point.

If you can pull it clear by more than half the height of a sprocket tooth then the chain is worn. Wear can also be assessed by checking for excess movement between links both along and across the line of the chain.
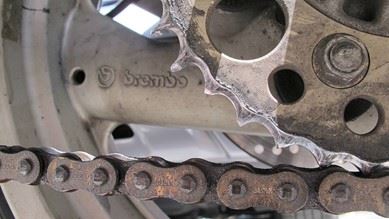
Sprocket wear is easy to check and is done by examining the exposed teeth at the rear of the front sprocket and at the front of the rear sprocket. You need to remove the cover to check the front sprocket, and you should support the bike on its centrestand or on a rear paddock stand so you can turn the rear wheel and check the whole of the sprocket. If the teeth are hooked or crescent-shaped and sharp on the top or if any teeth are chipped or broken the sprocket is worn.
Fitting a new chain and sprockets
The chain and sprockets run together, wear together, and so should be replaced together, as a set. Fitting a new chain onto old sprockets or fitting new sprockets then running your old chain around them is not good practice. It also makes good economic sense buying them as a set rather than individually as you will save a few quid that can go in your tank.
To view the range of MPW chain and sprocket kits go to https://motorcyclepartswarehouse.co.uk/engine-transmission/chains-belts-sprockets/chain-sprocket-kits.html.
To view the full range of MPW chains and sprockets go to https://motorcyclepartswarehouse.co.uk/engine-transmission/chains-belts-sprockets.html
