Road to Revival: Painting the Frame
With the Sandblasting/stripping done with, we could move on to de-tabbing and painting the frame.
Removing Frame Tabs
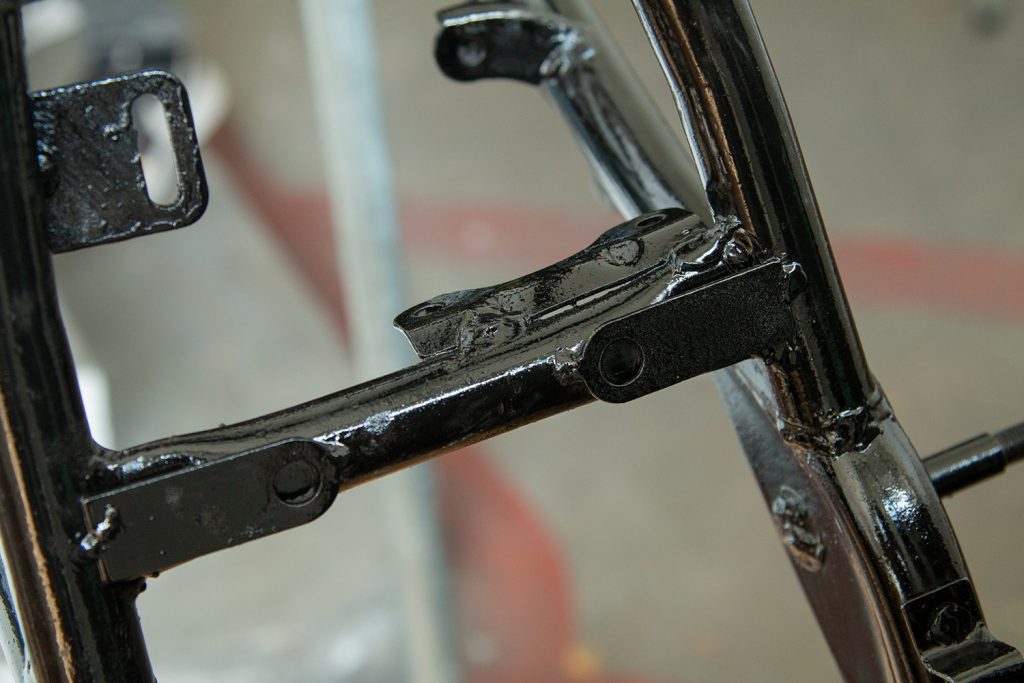
There are some extra tabs and brackets on the frame which we no longer need. In order to attempt to have a cleaner look for the finished bike, we wanted to grind these off as neatly as possible before painting.
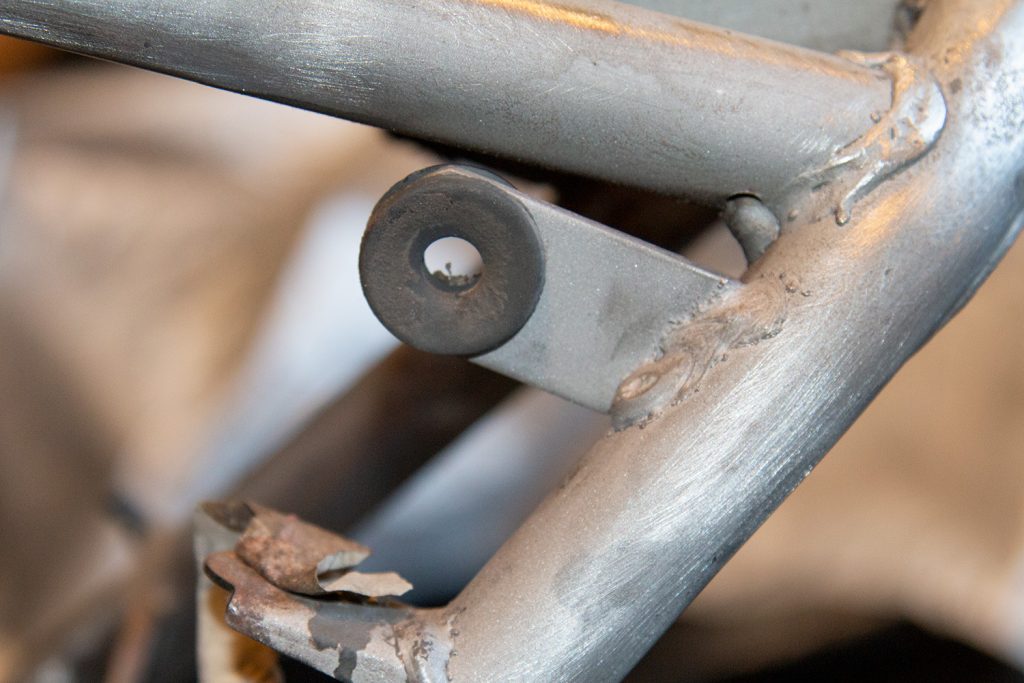
One of the offending tabs - this used to hold the airbox. That's being replaced with a K&N cone filter, so this can go!
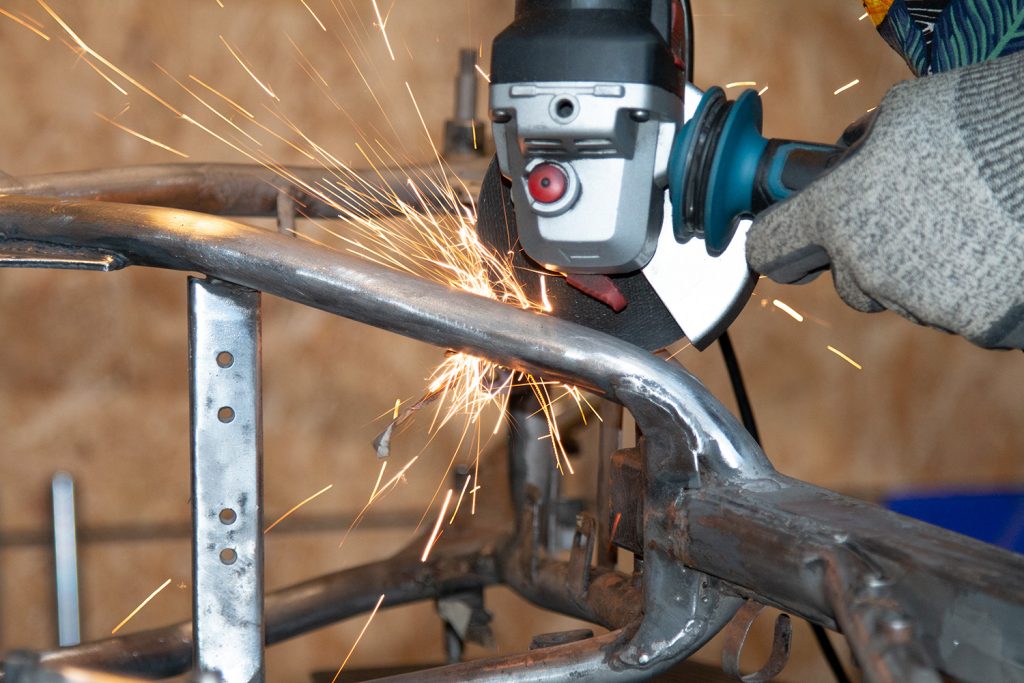
We used a few different discs - a cutting wheel and a flap disc for clean up, once the bulk of the brackets had been removed. This cleaned up the left over bits of weld pretty well.
Here's the first initial cut - trying my hardest not to nick the frame!
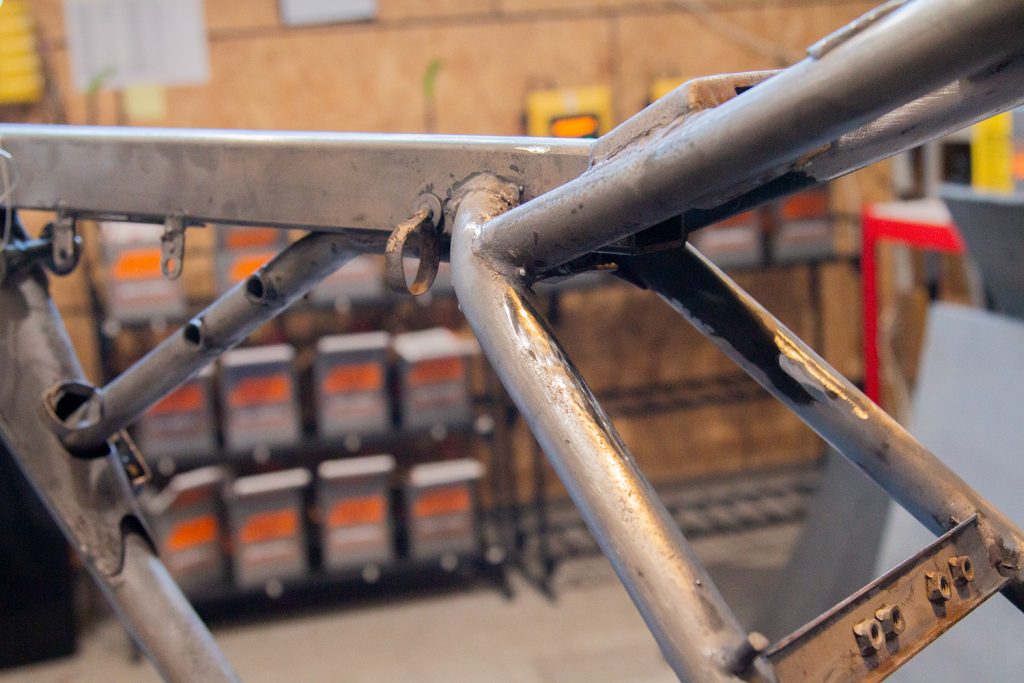
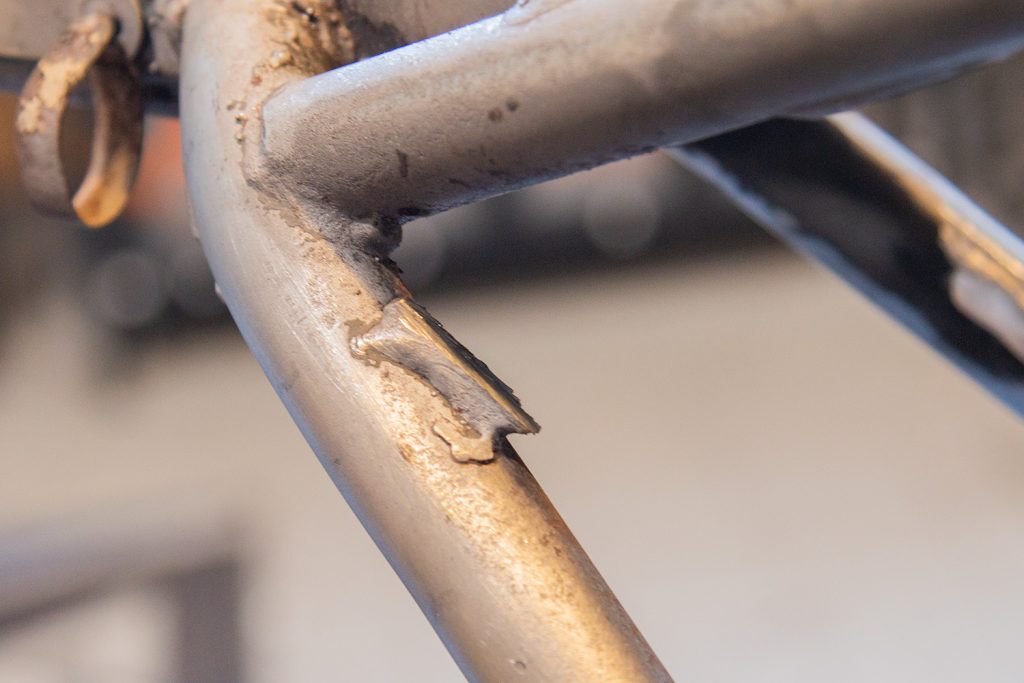
I then ground down the remnants of the bracket with a flap wheel until it was smooth with the frame tube. No more airbox brackets! That's better. I used the same technique to hack off all the other brackets we no longer needed. With that done, we could start on the first layer of paint.
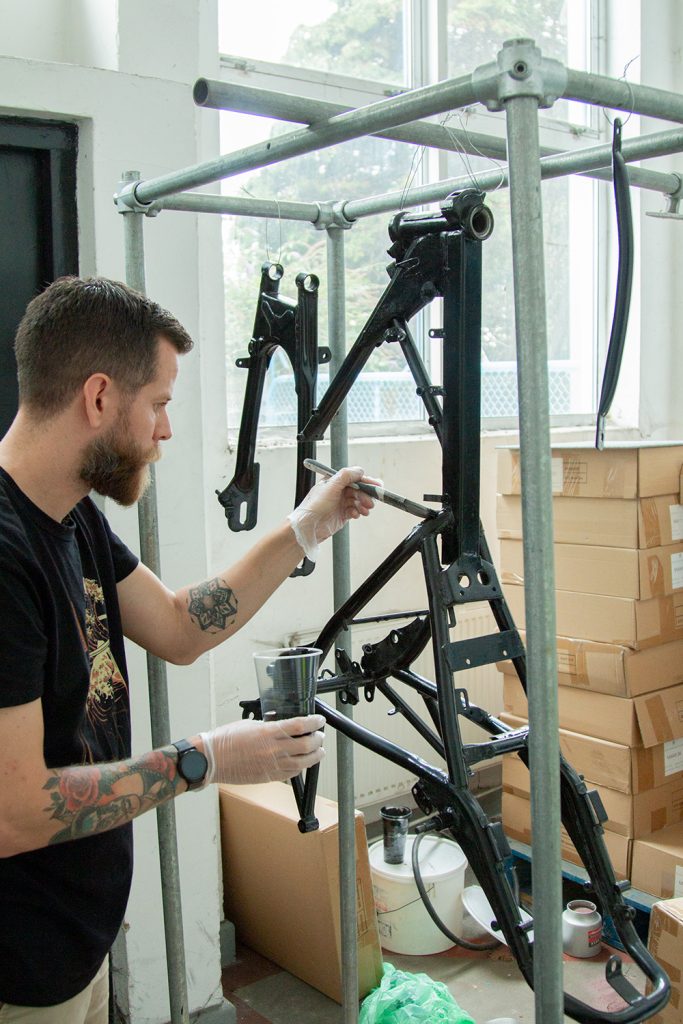
First Coats of Paint
We decided to try POR15, as this is a brand which often comes up in discussion around finishing motorcycle frames. It's pretty expensive for a few tins and some thinner - our order came to around £140. This will paint at least 3 frames by our estimation, we really didn't need a lot of paint for each layer. People also discuss the best way to apply the paint - some use foam brushes, but these tend to disintegrate. You can also use a roller, but for our frame with all it's nooks this didn't seem like a practical option.
We used a Harris 2" No Loss paintbrush, which worked really well - we wanted to make sure we didn't get any brush hairs in the finish. This brush did not lose any bristles at all, which was a relief. If you're going to use a brush to apply POR15, I'd recommend this one. They aren't the cheapest brushes, but it's worth it to avoid the aggro of loose bristles.
Rust Preventative
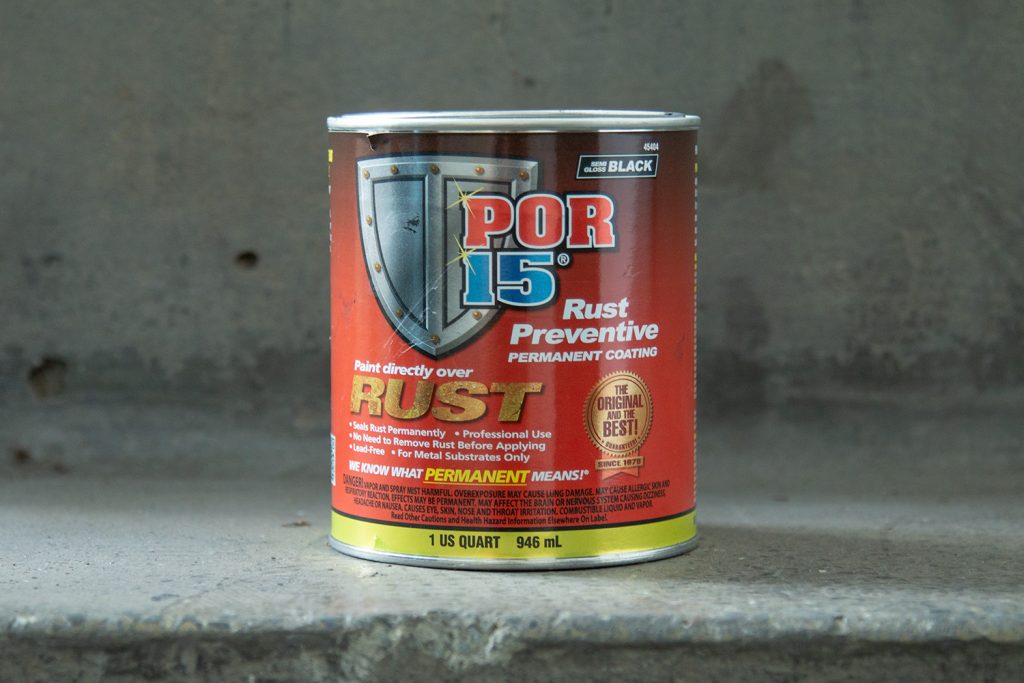
For the first two coats, we used POR15 Rust Preventative. This was quite a thin consistency straight out the tin, which meant we didn't need to thin it with any solvent. We followed the instructions and mixed the paint with a stick - remember not to shake the can! I assume POR15 isn't a fan of bubbles.
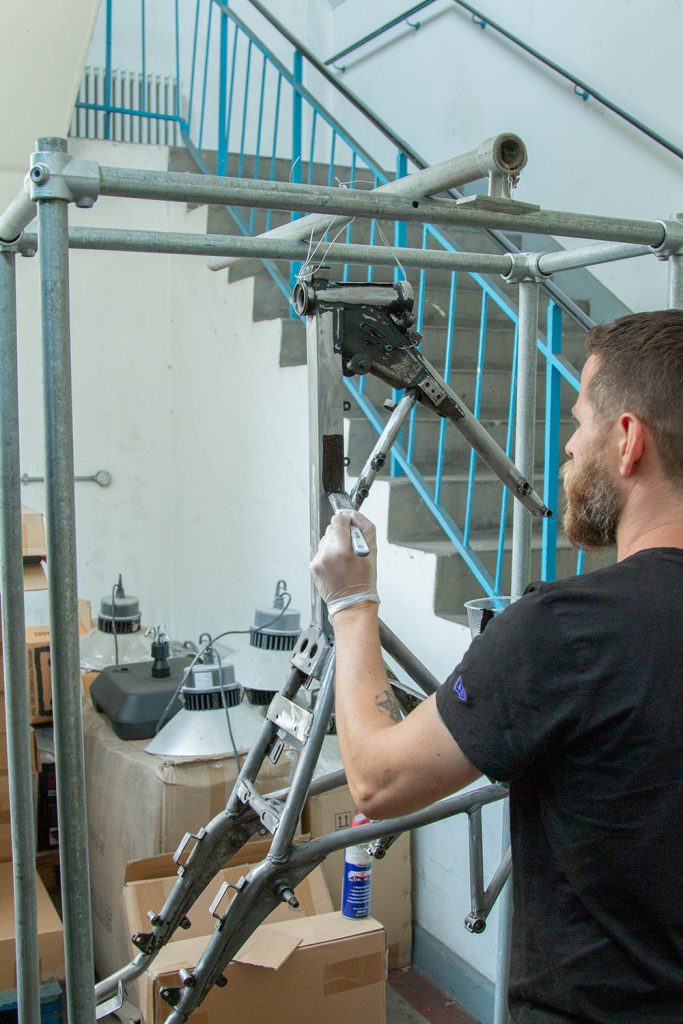
The instructions mention you can paint straight onto a sandblasted surface, or directly to rust - so it is ideal for our frame! We did give the frame a quick rub down with a cloth and some degreaser, to make sure there was no flaky paint or blasting media stuck to it.
It is well worth using gloves when dealing with POR15, as it will permanently stain your skin! It'll stick with you for a week or so until your skin sheds. Ask me how I know! It is also important to work in a well ventilated area - though we did not find the fumes from the paint particularly strong.
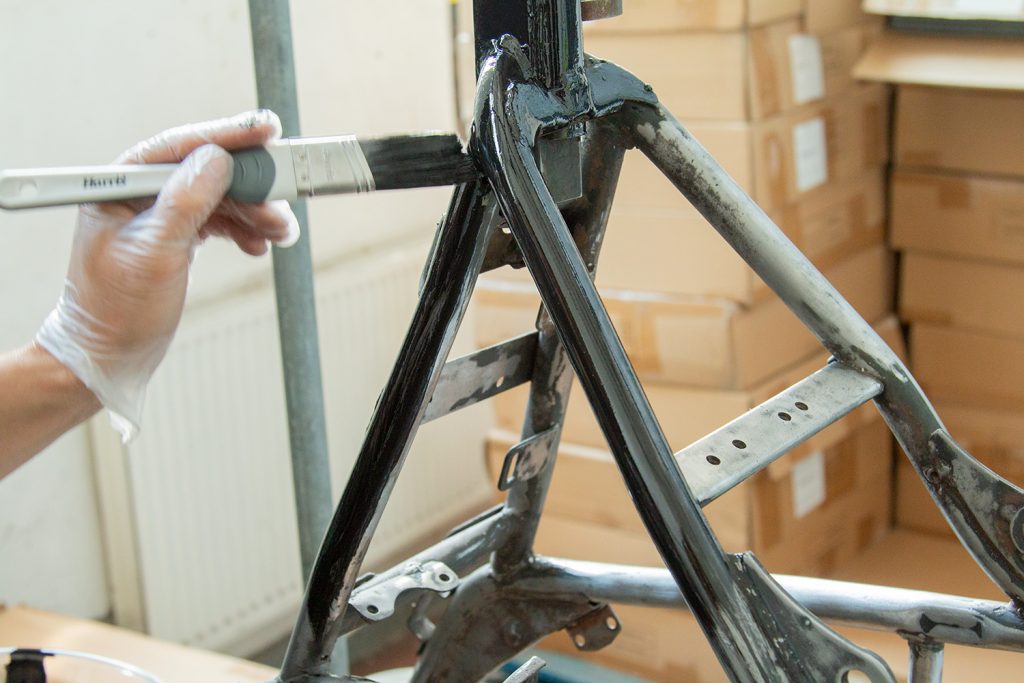
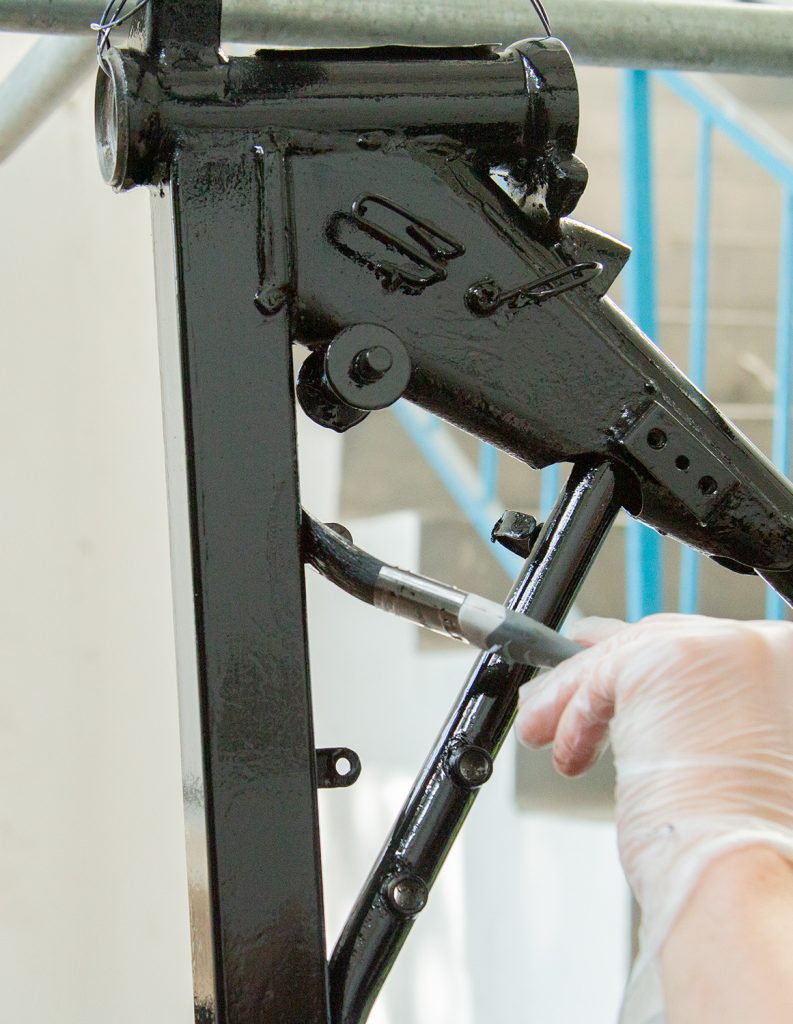
As POR15 is self levelling, brush marks weren't really an issue. The the rust preventative layer dries to a semi gloss finish. This helps to show areas where you haven't painted on your second coat. It is painfully obvious to see any areas under the finish where you didn't sand, or which were affected by rust. The more time you spend with prep, the better your finish will be. We applied the second coat after a few hours, once the first coat was tacky, but not dry.
Top Coat
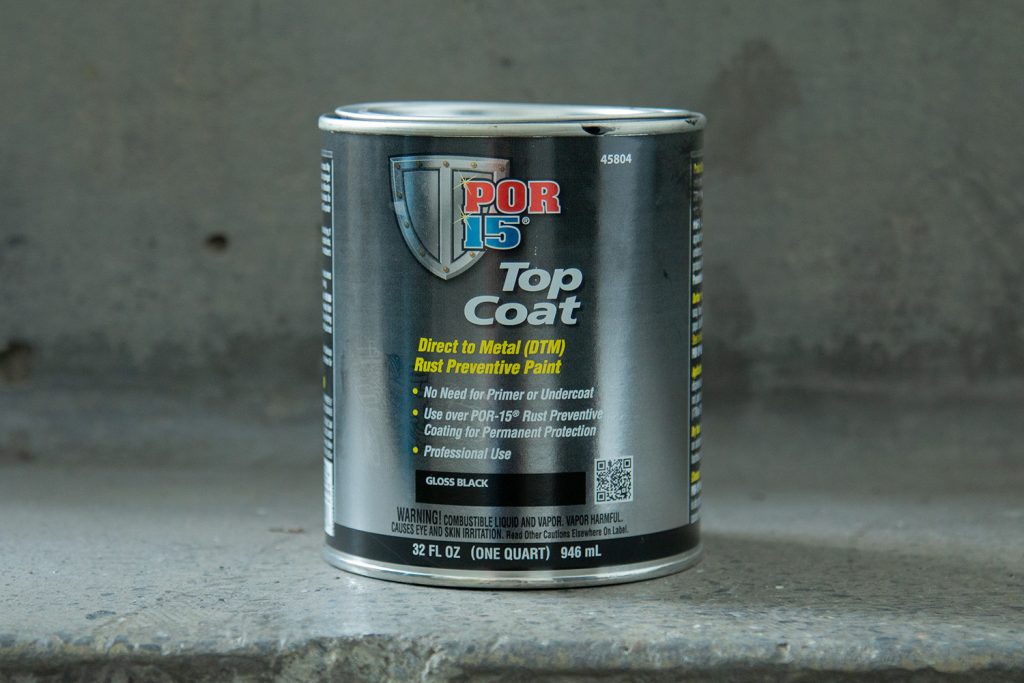
Once the first layers had been left to dry for a few days, we were ready to apply the top coat. You can just use the rust coating, but this is not resistant to UV. If you were to rely on the the rust coating alone it would fade over time in the sun. The top coat will give an even more durable finish in the long run.
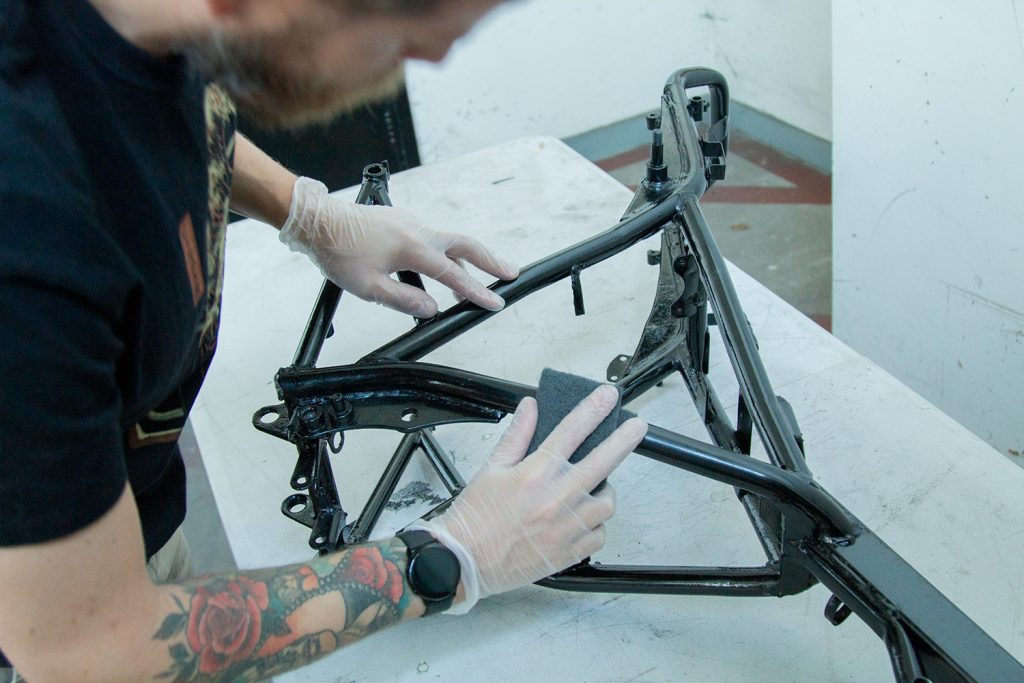
Before applying the first layer, we needed to lightly scuff the paint with an abrasive pad. The POR15 Top Coat is a lot thicker than the rust preventative, but Oli decided not to thin it. POR15 suggest 10-20% solvent if you do decide to thin it down. From our experience this isn't completely necessary, but might help you achieve an even flatter finish.
Despite being thicker, the top coat went on as well as the base layers, and was also self levelling. Overall, we are happy with the finish we managed to get, with very little effort. If you're just looking to get your frame protected and aren't looking to produce a show bike, the finish of POR15 is perfectly usable for most projects. As mentioned earlier, the amount of paint we have from two 1 quart (946ml) tins is plenty for three frames. Time will tell how durable it is, but it's an infinite improvement over the rusted and sad looking frame we started with.
Next Steps
With the frame finally done with, we are on to getting the forks sorted, cleaning the engine up and refitting the swingarm and wheels...stay tuned for the next article in our Road to Goodwood!
Don't forget to check out the rest of the articles in the series, to follow along with our progress.
